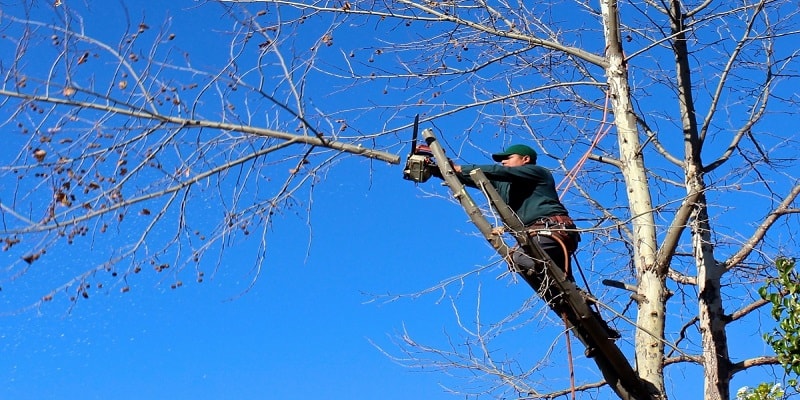
Pruning a tree is an essential part of maintaining its health, encouraging proper growth, and enhancing its aesthetic appeal. While it may seem daunting for beginners, with the right techniques and knowledge, anyone can learn to prune a tree effectively. This comprehensive guide will take you through the process step-by-step, equipping you with the necessary tools, timing, and safety precautions to ensure a successful pruning experience.

Why Prune a Tree?
Pruning is not just about trimming branches; it serves several crucial purposes for the overall well-being of your trees. By removing dead, diseased, or overcrowded branches, you boost better air circulation and sunlight penetration, which in turn encourages healthy growth and fruit production. Additionally, pruning helps shape trees and maintain their desired form, enhancing the aesthetic appeal of your landscape.
Read About: Difference Between Tree Trimming vs Pruning
From a safety perspective, pruning prevents branches from interfering with power lines, structures, or pathways, reducing potential hazards. Regular pruning also removes weak or damaged limbs, minimizing the risk of them falling and causing injury or property damage during storms or high winds.
Understanding Tree Anatomy
Trees have a complex anatomy that governs their growth patterns and informs proper pruning techniques. Let’s take a closer look:
Trunk: The trunk is the main woody stem that supports the entire tree. It transports water and nutrients from the roots to the branches and leaves.
Branches: Branches emerge from buds on the trunk or existing branches. Primary (scaffold) branches are the main structural limbs, while secondary branches extend from them, contributing to the tree’s canopy density.
Branch Bark Ridge & Collar: At the base of each branch, there is a bark ridge (raised area) and a branch collar (swollen area). These areas contain specialized tissues that help the tree compartmentalize wounds and resist decay. Proper pruning cuts should be made just outside the branch collar to boost efficient healing.
Buds: Buds are dormant growing points that contain unexpanded leaves or flowers. Terminal buds are found at the tips of branches and control upward growth, while lateral buds along the branches produce new shoots and branches.
Leaves: Leaves are the food factories of the tree, converting sunlight, water, and carbon dioxide into usable energy through photosynthesis.
Roots: The root system anchors the tree in the soil and absorbs water and nutrients. It typically extends outward to a distance equal to or greater than the height of the tree.
Understanding these anatomical features and how they work together is crucial for making informed pruning decisions that boost the tree’s health and natural growth patterns.

When to Prune a Tree
The timing of pruning is critical and varies depending on the type of tree and its growth patterns. Generally, the best time to prune is during the tree’s dormant season, typically late winter or early spring before buds break. This minimizes the risk of excessive sap flow and the potential for disease or pest infestations.
However, some trees, such as those that produce a heavy bloom or fruiting, may require pruning immediately after flowering or fruit production. It’s essential to research the specific pruning requirements for the tree species you’re working with.
Additionally, it’s advisable to prune when you notice dead, diseased, or broken branches, or when the tree’s growth begins to obstruct pathways, structures, or power lines.
Essential Tools for Pruning
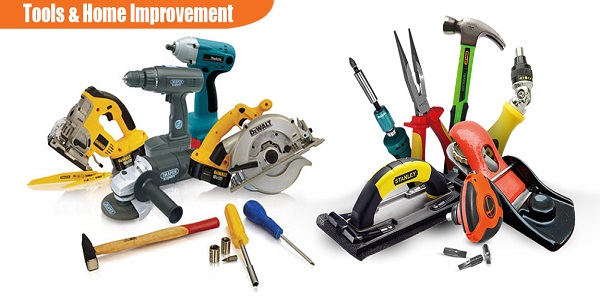
Having the right tools is crucial for safe and effective pruning. Here are some essential tools you’ll need:
Pruning shears or secateurs: These handheld tools are perfect for cutting small branches up to 1 inch in diameter. Look for bypass pruners, which create a clean cut and minimize damage to the tree.
Loppers: Loppers are long-handled pruning shears designed for cutting branches between 1 and 2 inches in diameter. They provide leverage and allow you to reach higher branches without a ladder.
Pruning saws: For larger branches, a pruning saw with a curved blade is essential. Choose a saw with a narrow blade to make clean cuts and prevent tearing or damaging the tree.
Pole pruners: These tools consist of a pruning head attached to a long pole, allowing you to reach and cut higher branches without a ladder. They are particularly useful for taller trees or those with dense canopies.
Check Here: Best Cordless Pole Saws
Safety gear: Pruning involves sharp tools and potential falling branches, so it’s essential to wear protective gear such as gloves, goggles, and sturdy clothing to minimize the risk of injury.
How to Prune a Tree: Step-by-Step Pruning Guide
Now that you have the necessary tools and knowledge, let’s dive into the step-by-step pruning process:
Preparation
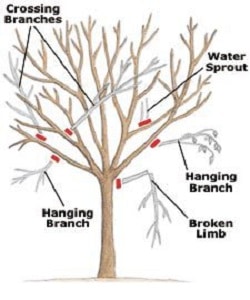
- Inspect the tree carefully, identifying any dead, diseased, or damaged branches that need to be removed.
- Plan out your cuts by visualizing the desired shape and size of the tree after pruning.
- Ensure you have a clear workspace, free from obstructions or hazards.
Basic Pruning Techniques
The three main pruning techniques mentioned in the guide – thinning, raising, and reduction – serve different purposes and require specific approaches:
1. Thinning:
- Thinning involves selectively removing branches from the interior of the tree’s canopy to increase air circulation and sunlight penetration.
- This technique is often used on densely foliated trees or those with overcrowded branches.
- When thinning, focus on removing smaller, inward-facing branches while retaining the tree’s overall structure and shape.
- Proper thinning can boost healthier growth, reduce the risk of disease, and improve the tree’s aesthetic appeal.
2. Raising:
- Raising refers to the removal of lower branches to provide clearance for pedestrians, vehicles, or structures.
- This technique is commonly used along sidewalks, driveways, or near buildings to prevent interference and potential hazards.
- When raising, prioritize removing branches that are growing inward, crossing, or rubbing against other branches.
- Maintain a gradual upward taper of the remaining branches for a natural appearance and to prevent creating unsightly gaps or “windows” in the canopy.
3. Reduction:
- Reduction pruning involves shortening the length of branches to reduce the overall size or height of the tree.
- This technique is often used to control the size of a tree that is outgrowing its designated space or to prevent interference with nearby structures or power lines.
- When reducing, make proper thinning cuts to lateral branches or buds, rather than cutting branches midway along their length (known as heading cuts).
- Reduction pruning should be done gradually over several years to minimize stress on the tree.
By understanding and properly applying these pruning techniques, you can effectively maintain the health, structure, and desired appearance of your trees.
Making the Cut
Proper cutting techniques are crucial for minimizing damage to the tree and promoting efficient healing. Here’s an in-depth look at the recommended methods:
Step 1. Branch Collar Cut:
- The ideal pruning cut should be made just outside the branch collar, which is the swollen area at the base of the branch where it meets the trunk or larger branch.
- Cutting too close to the trunk can damage the trunk tissue, while cutting too far from the branch collar can leave a stub that is susceptible to decay.
- Make the cut at a slight angle, sloping away from the remaining branch or trunk, to prevent water accumulation on the cut surface.
Step 2. Three-Cut Method for Large Branches:
- For branches larger than 2 inches in diameter, the three-cut method is recommended to prevent tearing or stripping of the bark as the branch falls.
- First, make an undercut about 6-12 inches from the branch collar, cutting roughly one-third of the way through the branch from the underside.
- Next, make a second cut from the top of the branch, a few inches further out than the undercut. This will allow the branch to break away cleanly without tearing the bark.
- Finally, make the final cut just outside the branch collar, following the branch collar cut technique described above.
Step 3. Avoiding Stub Cuts and Flush Cuts:
- Stub cuts, where a portion of the branch is left protruding from the trunk or larger branch, should be avoided as they create entry points for pests and diseases.
- Flush cuts, where the entire branch is cut flush with the trunk or larger branch, should also be avoided as they remove the protective branch collar and expose more trunk tissue to potential damage and decay.
Step 4. Cutting Angle and Direction:
- Make pruning cuts at a slight angle (around 45 degrees) to prevent water accumulation on the cut surface.
- Cut away from the remaining branch or trunk to avoid tearing or stripping the bark.
Step 5. Clean Cuts:
- Use sharp, well-maintained pruning tools to ensure clean, precise cuts that will heal efficiently.
- Avoid tearing or crushing the bark, as this can damage the tree’s vascular system and increase the risk of disease or insect infestation.
Pruning Young vs. Mature Trees
Young trees require different pruning techniques compared to mature trees. For young trees, focus on establishing a strong central leader and well-spaced branches. For mature trees, the goal is to maintain their structural integrity and shape while removing any problematic or hazardous branches.
Common Pruning Mistakes to Avoid
While pruning may seem straightforward, there are some common mistakes that beginners should be aware of and avoid:
Over-pruning: Removing too many branches or excessive foliage can stress the tree and hinder its growth and health. As a general rule, never remove more than one-quarter of the tree’s branches in a single season.
Improper cuts: Failing to make clean, properly angled cuts can damage the tree and leave it susceptible to disease and pests. Always use sharp, high-quality pruning tools and follow the recommended cutting techniques.
Ignoring tree health: It’s essential to inspect the tree for signs of disease, pests, or other health issues before pruning. Pruning a sick or infested tree may exacerbate the problem or spread the issue to other plants.
Safety Tips for Pruning
Safety should always be the top priority when pruning trees, as the work involves sharp tools, potential falling branches, and working at heights. Here are some additional in-depth safety precautions to consider:
Personal Protective Equipment (PPE)
- Wear non-slip, sturdy footwear with good traction to prevent slips and falls.
- Protect your eyes by wearing safety goggles or glasses to guard against flying debris or branches.
- Use thick, well-fitted gloves to protect your hands from cuts, scrapes, and splinters.
- Consider wearing a hard hat if you’re working with larger branches or trees to protect your head from falling debris.
- Wear long pants and long-sleeved shirts to minimize exposure to scratches and insect bites.
Ladder Safety
- Use the right ladder for the job, ensuring it is rated for the appropriate weight and height.
- Set up the ladder on level, firm ground, and secure it by tying it off or using a ladder stabilizer if needed.
- Always maintain three points of contact (two feet and one hand, or two hands and one foot) when climbing or working on a ladder.
- Never overreach or lean too far to the side, as this can cause the ladder to tip over.
- Consider using a positioning belt or harness if you need to work at significant heights or in precarious positions.
Electrical Hazards
- Be aware of any overhead power lines in the vicinity and maintain a safe distance from them at all times.
- If branches are in close proximity to power lines, contact your local utility company for assistance rather than attempting to prune them yourself.
Environmental Awareness
- Check for wildlife or nests in the tree before pruning, and avoid disturbing any protected species or their habitats.
- Be mindful of your surroundings and ensure there are no people, pets, or valuable property in the potential fall zone of branches or debris.
Proper Tool Handling
- Keep pruning tools sharp and well-maintained to ensure clean, efficient cuts.
- Use tools only for their intended purpose and follow all manufacturer guidelines for safe operation.
- Store tools securely when not in use, and never leave them unattended where they could pose a tripping or injury hazard.
Aftercare for Pruned Trees
Once you’ve finished pruning, your work isn’t quite done. Proper aftercare is crucial for the tree’s recovery and continued health:
- Post-pruning inspection: Carefully inspect the pruned tree, ensuring all cuts are clean and no stubs or torn bark remain.
- Watering and fertilizing: After pruning, trees may need additional water and fertilizer to support their recovery and boost new growth.
- Monitoring regrowth: Keep an eye on the pruned tree over the following weeks and months, watching for signs of new growth and adjusting your future pruning plans accordingly.
Final Thoughts
Pruning a tree is an essential skill for any homeowner or gardening enthusiast. By following the techniques and tips outlined in this guide, you can confidently and safely prune your trees, boost their health, enhancing their appearance, and ensuring they thrive for years to come.
Remember, pruning is an ongoing process, and it’s essential to stay vigilant and adapt your approach as your trees grow and mature. Don’t hesitate to seek professional assistance if you encounter particularly challenging or hazardous situations.
Enjoy the fun of hands-on gardening and feel proud as you nurture your trees to be their very best. Share your pruning experiences, ask questions, and continue learning from the vast gardening community. Together, we can create beautiful, healthy landscapes that provide enjoyment and value for generations to come.
FAQs
How often should I prune my trees?
The frequency of pruning depends on the tree species, age, and growth rate. As a general guideline, most trees benefit from annual or biennial pruning to maintain their shape and health.
Can I prune trees during the summer?
It’s generally not recommended to prune during the summer months, as the trees are actively growing, and pruning can stress them further. However, some exceptions may apply, such as removing dead or damaged branches or pruning fruit trees after the harvest.
Should I use pruning paint or sealers on cut branches?
Modern arboricultural practices generally discourage the use of pruning paints or sealers, as they can slow healing and trap moisture, leading to decay. Proper pruning techniques that create clean cuts are usually sufficient for the tree to seal itself naturally.
Can I prune a tree in the rain or after a rain?
It’s best to avoid pruning during or immediately after rain, as wet conditions can increase the risk of spreading diseases and make it more difficult to create clean cuts. Wait for dry weather and allow the tree to dry out before pruning.
How do I know if a branch is dead and needs to be removed?
Look for signs like lack of foliage, peeling or cracking bark, and brittleness. Scratch the bark with your fingernail or a pruning tool – if the layer underneath is green, the branch is still alive. If it’s brown and dry, it’s likely dead and should be removed.
Can I prune a tree myself, or should I hire a professional?
For small trees and routine pruning, homeowners can often handle the task themselves with the right tools and knowledge. However, for large, mature trees or those near power lines or structures, it’s advisable to hire a certified arborist or tree care professional for safety and proper technique.
Additional Resources
If you’re looking to deepen your knowledge of tree pruning or seek additional guidance, read this book “Pruning Made Easy” by Lewis Hill.


