Air compressors are an essential piece of machinery in industrial and workshop settings. But they also present unique challenges over time. Especially the hoses, as they are always under constant strain. That brings us to a pretty common problem in air compressors, leaky hose.
The great news is it’s also easy to fix a hose leak even if you haven’t done this before. To solve this issue, all you need is some common tools and patience. For your convenience, today we will discuss how to fix a leaky air compressor hose and all the possible causes related to it.

Let’s cut right to it.
How to Fix a Leaky Air Compressor Hose?
Here is how we can fix a leaky air compressor hose, step by step.
1. Finding Leaking Area
The solution to any problem begins with properly identifying the problem. In the case of fixing hose leakage, you need to find out the exact place of leakage. There are a few ways you can check leakage on the hose pipe.

Listening: By listening to leaking noise you can find most hose leaks. To do this properly, you need to turn on the compressor and apply a steady stream of pressure. If your leak is very small you may have a hard time finding it, you can move on to the next method.
Feeling: Loosely grab the hose and move from one point to another. You should feel a cool flow of air. If that doesn’t yield any result, try the next method.
Soap Water: Using soap water to find leaks is the most popular and effective method you can try. This effective technique can identify even the tiniest leak on the hose effortlessly. To use this method, first, make a bowl of soap-water solution. Then slowly pour soap water onto the hose all the way to the end.
Remember to check for any bubbles as you move. Double-check all the joints, clamps, extension hubs. At this stage, you would either find leaks on the midpoint of the hose or on any connecting points. Follow these procedures to fix these problems.
2. Fixing Leaks on the Joints

If you find leaks on joints or connecting points, this is a relatively easy and inexpensive fix. In most cases tightening the clamps with a flat-headed screwdriver will solve the issue. After that, check again with the soap water for the leak.
If the leak persists, remove the clamp and disconnect the hose from the point. Cut roughly one inch of hose from the start and refit the hose with a clamp. If your clamp looks rusty, this is as good a time as any to replace it with a new one.
The same process goes with the extension hubs as well. First, remove the hose and clamps, cut out the bad section and refit the hose with good condition steel clamps. Lastly, do a final check to confirm there are no more leaks.
3. Fixing Leaks in the Middle of the Hose
Fixing hose leaks in the middle requires a bit more work than fixing hose joints. You will need-
- Hose joining kit
- Screwdriver
- Sharpe Blade
- Teflon tape
- Adhesive
Now follow these steps to fix your hose leaks. If you have multiple leaks on the same hose, the process is the same. Just do the same task for every hose leak
Discard the Leaking Portion
You will start the process by removing the leaking section. Take a Sharp blade and cut the leaking part of the hose. Do not use a dull blade as it will damage the surface trying to cut it on several tries.
For the best result, cut 1 or 2 inches from both sides of the leaking point. This will make sure the kit fits nicely and provides an overall good joint.
Attach the Joining Kit
Now place the joining kit between the hose section along with a few drops of adhesive. Make sure to put enough pressure to push the kit into the hose at least half of the way. Then the rest of the half-length goes to the other portion of the hose. Now you can move on to tighten up the steel clamps.
It’s good to know Instead of adhesive, you can also wrap Teflon tape on the hose to make an air-tight seal. You don’t need much; just a couple of turns is enough for a secure seal.
Tighten the Steel Clamps
Once you finish setting the kit properly, it’s time to tighten the steel clamps. You will need two clamps on both ends for this operation. Make sure they are fairly new. Old rusty clamps won’t do you any good in the future. If possible, use brand new heavy-duty clamps.
For the tightening job, there should be a small screw on the side overlapping the kit and hose end. Take your flat-headed screwdriver and slowly turn clockwise to tighten. After a couple of turns, it should grip onto the hose nicely. Do the same on the other side.
Inspect the Overall Fittings
After that, splash some soap water on the joint and test the effectiveness of the joint while running the compressor. If everything goes right you would not see any bubbles this time.
Added Safety
You can also wrap Polly around the leakage point to make another layer of a seal. It would give some protection to the clamps from any damages and prevent rust.
4. Replacing the Entire Hose
Replacing the entire hose could be a good idea when the existing hose wore out badly. Depending on the usage it may take a couple of years or in some cases a lot sooner. Whatever the case may be, always try to buy a properly rated hose for your particular air compressor. Not complying with the compressor’s pressure standard will result in premature damage. Nobody really wants that.
Once you have purchased the suitable replacement hose, bring out the tools and put on your safety gloves. The process is simple. Remove the hose from the compressor and the nozzle. Attach the new hose with the compressor and the nozzle. Lastly, check if there is any leakage in the new hose.
Possible Causes of an Air Compressor Leaking Air
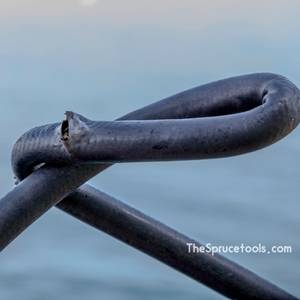
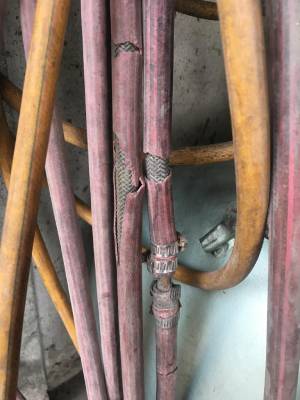
Generally, vibration from the motor, pressure fluctuation and extreme temperature are some of the reasons hoses develop cracks and tears. If this continues it eventually leads to hose leaks. Here are some other scenarios that may result in leaks.
Faulty Fittings: Air compressor hose require tight fittings in every connecting point. If any joint or clamps have loose fittings, they will inevitably leak air.
Underrated hose: Like any pneumatic part, the hose also has a certain pressure tolerance. If you use a cheap hose or something that is not suitable for maximum pressure the air compressor generates, it will tear.
Unnecessary bending or twisting: Long hose has a tendency to twist in multiple places. It is also possible to bend and leave creases, which then creates a perfect weak point for cracks.
Flying debris: In the workshop scenario, damage from flying debris is not uncommon. If you are not careful when using power tools or any operation that involves high-speed projectiles, it can damage your hose.
How to Prevent the Hose From Leaking in the Future?
So, we have discussed some possible causes and how to fix a leak in the air compressor hose. It would be easy for you to fix this problem more confidently. But it is indeed a major inconvenience when you need your air compressor ready to do a job. Eventually, it could hamper your regular flow of work.
It doesn’t end there. A leaky air compressor hose can waste a lot of resources and money. Even a small leak can make it more difficult to operate your air compressor. It could result in higher costs for electricity or gas, since you may have to run the unit longer.
Additionally, if you are connecting your air compressor directly to a tire pressure gauge, you will get an inaccurate reading due to the loss of pressure.
Luckily, there are ways you can avoid all that if you follow these simple tips.
Maintain Cleanliness
It’s as simple as that. Keep your air compressor hose and all the parts clean. Dust, debris, and other loose particles are not too friendly with an air compressor. It’s better to wipe clean all the components once in a while. Take extra care of the hose as that has a higher tendency to leak.
Pre-check Hose
Checking your hose condition regularly is a good habit. If possible check the hose before each major air compressor task. Generally, you should be looking for cracks, unusual creases, and damages. The moment you see any of these, do a proper inspection and try to fix them accordingly.
Use Rated Components
Air compressor continuously runs with high air pressure. So it is imperative that all the components and accessories you will use must have the appropriate pressure tolerance rating. Such as clamps, hoses, nozzles, pressure gauges, and so on. This will ensure safe operation and prevents any breakdown.
Use Teflon Where Possible
Teflon tape works wonders as a sealant. Try to use as much as often in any rejoining work, fittings, and nozzle replacement. It will significantly reduce any air gap and guarantee a snug fit all around the channel.
Final Words
If you own an air compressor a leak in the tubing can be very annoying, so make sure you are aware of the reasons for such a leak and invest in a good quality hose upfront. The cost of a hose is far less than the actual air compressor, but it has a large impact on your machine’s overall performance.
So that’s all from us today. Hopefully, by reading our step by step guide and other information now you know how to fix a leaky air compressor hose yourself and deal with it when the time comes.


