Rivets are a common fastening method used in various applications, from clothing and accessories to automotive and industrial projects. These small, cylindrical metal fasteners are designed to create a permanent, secure connection between two or more materials. While rivets are incredibly useful, there may be instances where you need to remove them, whether for repairs, modifications, or repurposing.
In this comprehensive guide, we’ll explore the different types of rivets and various methods for removing them safely and effectively, including how to remove rivets without a drill, how to remove blind rivets, and how to remove rivets from leather.
Types of Rivets
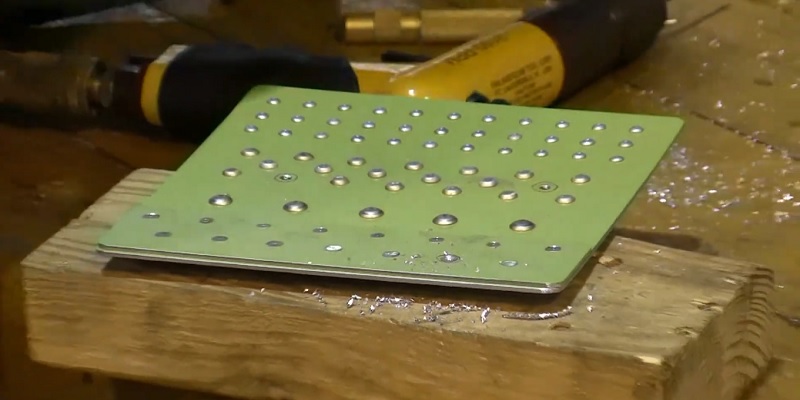
Before diving into the removal process, it’s essential to understand the different types of rivets you may encounter. The most common types include:
- Pop rivets (blind rivets): These rivets are hollow and are installed using a special tool called a rivet gun. They are commonly used in applications where access to the back side of the material is limited.
- Solid rivets: Made from a solid piece of metal, these rivets are installed by hammering the end to create a flattened head on both sides of the material.
- Tubular rivets: Similar to solid rivets, tubular rivets have a hollow center and are often used in leather work and other applications where a more decorative appearance is desired.
Understanding the differences between rivet types is crucial, as the removal methods may vary slightly depending on the specific rivet you are dealing with.
Quickest and Easiest Way to Remove Rivets: Using a Drill
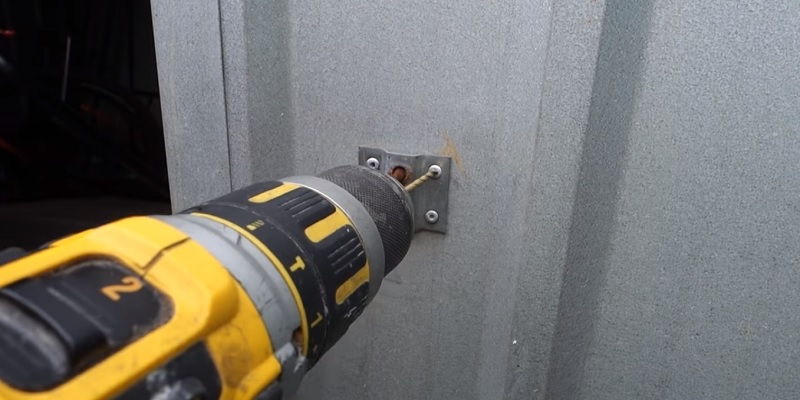
In our experience, the most effective and efficient method for removing rivets is by using a drill. This approach works well for most types of rivets, including blind rivets (pop rivets), and allows for precise removal. To ensure accuracy, we recommend using a center punch to create a small dimple in the center of the rivet head before drilling. This will help guide the drill bit and prevent it from slipping off the rivet.
To remove rivets using a drill, follow these steps:
- Wear safety glasses and gloves to protect yourself from debris.
- Use a center punch to create a small indentation in the center of the rivet head.
- Select a drill bit slightly smaller than the diameter of the rivet shaft.
- Carefully drill through the center of the rivet head, using the center punch mark as a guide.
- Once the head is drilled through, use pliers to remove the remaining rivet shaft from the material.
No need for any expensive drill; choose the best cordless drill under $50
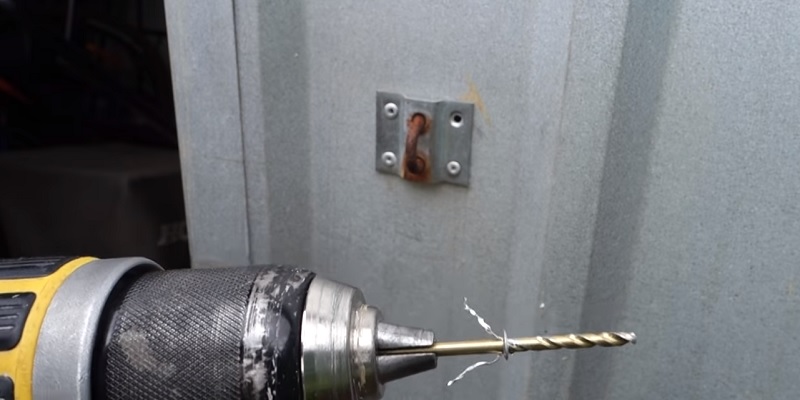
This method is quick, precise, and works for most rivet types, including blind rivets, making it our go-to technique for rivet removal.
Removing Rivets Without a Drill
While a drill is the most efficient tool for removing rivets, there are several methods you can use to remove rivets without one. These techniques are particularly useful when you don’t have access to a drill or want to minimize the risk of damaging the surrounding material.
Using a Rivet Removal Tool
A rivet removal tool is a specialized device designed to extract rivets quickly and easily. These tools typically consist of a handle, a gripping mechanism, and a sharp point or blade. To use a rivet removal tool, follow these steps:
- Position the tool’s point or blade on the center of the rivet head.
- Squeeze the handles firmly to grip the rivet head securely.
- Twist the tool to shear off the rivet head.
- Once the head is removed, use the tool to push out the remaining rivet shaft from the back side of the material.
Using a Hammer and Chisel
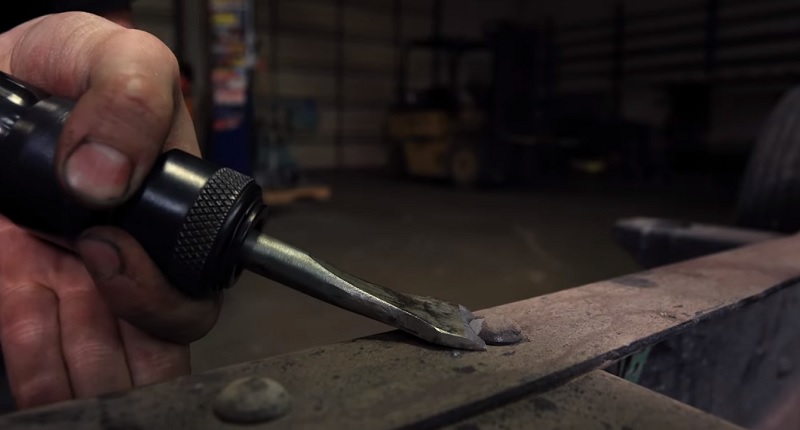
If you don’t have a rivet removal tool, a hammer and chisel can be used to remove rivets effectively. However, it’s essential to take proper safety precautions and use the appropriate equipment to avoid injury or damage to the materials.
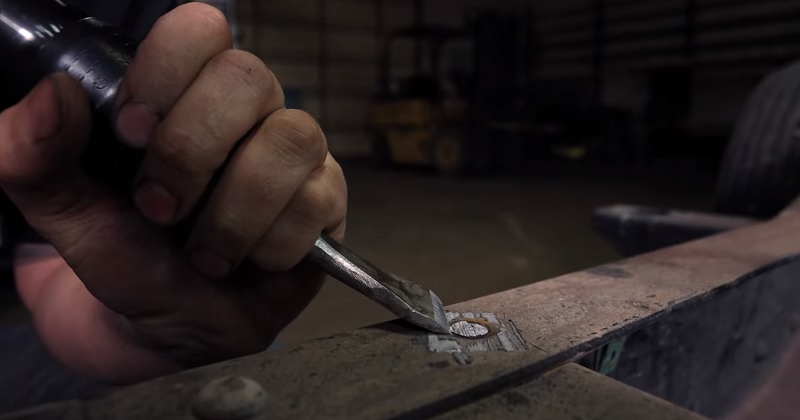
Here’s how to remove rivets with a hammer and chisel:
- Wear safety glasses and gloves to protect yourself from flying metal fragments.
- Place the chisel’s tip on the edge of the rivet head at a slight angle.
- Gently tap the chisel with the hammer to create a small divot in the rivet head.
- Reposition the chisel to the divot and strike it firmly with the hammer to shear off the rivet head.
- Once the head is removed, use the chisel to push out the remaining rivet shaft from the back side of the material.
Using a Grinder or Cutting Wheel
For stubborn rivets or those made from harder metals, a grinder or cutting wheel can be used to remove them. This method requires extreme caution and proper safety gear, as the process can generate sparks and flying metal particles. To remove rivets with a grinder or cutting wheel:
- Wear safety glasses, gloves, and a face shield to protect yourself from debris.
- Secure the workpiece firmly to prevent it from shifting during the removal process.
- Use a thin cutting wheel or grinder attachment to carefully cut through the rivet head, making sure not to damage the surrounding material.
- Once the head is removed, use pliers or a chisel to push out the remaining rivet shaft from the back side of the material.
Removing Blind Rivets (Pop Rivets)
Blind rivets, also known as pop rivets, are commonly used in applications where access to the back side of the material is limited. These rivets are installed using a special tool called a rivet gun, which pulls the mandrel (the center pin) through the rivet body, causing it to expand and create a secure connection. To remove blind rivets, you can use a blind rivet removal tool.
Using a Blind Rivet Removal Tool
Blind rivet removal tool are specifically designed to remove blind rivets (pop rivets) by gripping and removing the mandrel and head in one motion. To use a blind rivet removal tool:
- Position the tool’s point or blade on the center of the rivet head.
- Squeeze the handles firmly to grip the rivet head and mandrel securely.
- Twist the tool to simultaneously shear off the rivet head and extract the mandrel.
- Once the head and mandrel are removed, use pliers to pull out the remaining rivet body from the material.
Blind rivet removal tools are the most efficient choice for removing pop rivets, as they are designed to handle the unique structure of these fasteners in a single, smooth motion.
Removing Rivets from Leather
Leather items, such as jackets, bags, and shoes, often feature decorative or functional rivets. When removing rivets from leather, it’s essential to assess the item and rivet type to determine the best removal method. Two common tools for removing rivets from leather are a leather punch and a seam ripper or sharp knife.
Using a Leather Punch
A leather punch is a tool designed to create clean, round holes in leather. It can also be used to remove rivets by punching out the rivet head and shaft. To use a leather punch for rivet removal, follow these steps:
- Select a punch size slightly larger than the rivet head.
- Position the punch over the rivet head and strike it firmly with a mallet.
- Remove the detached rivet head and use the punch to push out the remaining rivet shaft from the back side of the leather.
Using a Seam Ripper or Sharp Knife
A seam ripper or sharp knife can be used to carefully cut around the rivet head, allowing you to remove it and the rivet shaft from the leather. However, this method requires a steady hand and extreme caution to avoid damaging the leather. To remove rivets from leather using a seam ripper or sharp knife, follow these steps:
- Wear gloves to protect your hands and ensure a secure grip on the tools.
- Carefully insert the seam ripper or knife tip under the edge of the rivet head.
- Gently cut around the circumference of the rivet head, taking care not to cut into the leather.
- Once the head is freed, use pliers to remove the rivet shaft from the leather.
Rivet Removal Tools
There are several types of rivet removal tools available on the market, each designed to make the removal process quicker, easier, and more efficient. The two main categories are manual rivet removal tools and pneumatic rivet removal tools.
Manual Rivet Removal Tools
Manual rivet removal tools are hand-operated and typically consist of a handle, a gripping mechanism, and a sharp point or blade. These tools are ideal for occasional use or small-scale projects. Some popular manual rivet removal tools include:
Rivet removal pliers: These pliers feature a sharp point or blade designed to grip and shear off rivet heads.
Rivet removal tool with interchangeable heads: This versatile tool comes with multiple head attachments to accommodate different rivet sizes and types.
Pneumatic Rivet Removal Tools
Pneumatic rivet removal tools are powered by compressed air and are designed for heavy-duty, high-volume rivet removal applications. These tools are faster and more efficient than manual tools but require an air compressor to operate. Pneumatic rivet removal tools often feature adjustable settings to accommodate different rivet sizes and materials.
Choosing the Right Tool for the Job
When selecting a rivet removal tool, consider factors such as the type and size of the rivets you’ll be removing, the frequency of use, and the materials you’ll be working with. For occasional, light-duty tasks, a manual tool may suffice. However, if you anticipate frequent rivet removal or are working with tough materials, investing in a pneumatic tool may be more efficient in the long run.
Proper Maintenance and Storage of Rivet Removal Tools
To ensure your rivet removal tools remain in good working condition, it’s essential to maintain and store them properly. Always clean your tools after each use, removing any debris or metal shavings that may have accumulated. For pneumatic tools, regularly lubricate moving parts and check for air leaks to maintain optimal performance. Store your tools in a dry, secure location to prevent rust and damage.
Safety Precautions and Tips
When removing rivets, it’s crucial to prioritize safety to avoid injury and minimize the risk of damaging the materials you’re working with. Always wear appropriate protective gear, such as safety glasses, gloves, and a face shield, to safeguard against flying metal fragments and debris.
Work in a well-ventilated area, especially when using power tools like grinders or cutting wheels, to minimize exposure to dust and fumes. Secure your workpiece firmly to prevent it from shifting during the removal process, which can lead to accidents or inaccurate removal.
To avoid damaging the surrounding material, take care to center your tools on the rivet head and apply only the necessary force to remove the rivet. If you’re unsure about the best removal method for a particular rivet or material, consult a professional or refer to the manufacturer’s guidelines to ensure the best results.
Conclusion
Removing rivets may seem daunting at first, but with the right tools, techniques, and safety precautions, it can be a straightforward process. By understanding the different types of rivets and the various removal methods available, you can tackle any rivet removal task with confidence.
Whether you choose to use a drill for quick and precise removal or opt for alternative methods when a drill is not available, this comprehensive guide has provided you with the knowledge and step-by-step instructions to get the job done. Remember to select the appropriate method and tools for your specific project, and always prioritize safety to ensure a successful outcome.
With practice and patience, you’ll soon master the art of rivet removal, allowing you to repair, modify, or repurpose items with ease. Embrace the challenge and enjoy the satisfaction of completing your projects with newfound skills and knowledge.


