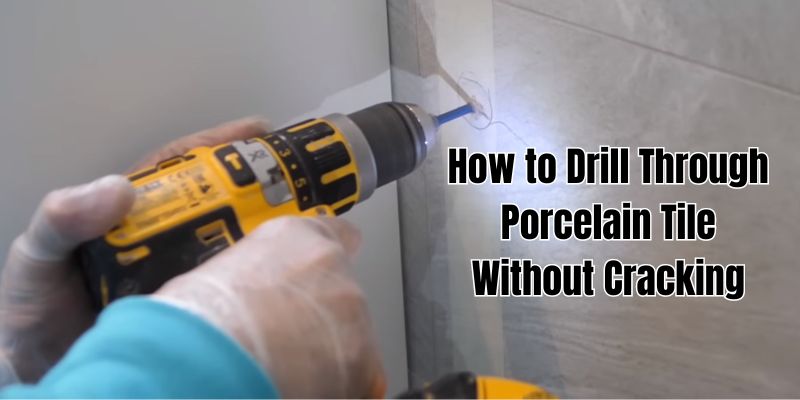
Drilling through porcelain tile can be a daunting task for DIY enthusiasts and professionals alike. The dense and brittle nature of porcelain makes it prone to cracking, especially when not handled with care during the drilling process. In this comprehensive guide, we’ll walk you through the steps and techniques needed to successfully drill through porcelain tile without causing any damage. By following our expert advice and using the right tools, you’ll be able to tackle this challenging task with confidence.

Understanding Porcelain Tile
Porcelain tile is a popular choice for both residential and commercial spaces due to its durability, water resistance, and aesthetic appeal. However, these same characteristics also make it difficult to work with, particularly when it comes to drilling. The dense and brittle nature of porcelain means that it requires special tools and techniques to avoid cracking or shattering during the drilling process.
Tools and Materials Needed
To successfully drill through porcelain tile without cracking, you’ll need the following tools and materials:
Diamond-tipped drill bit: A high-quality, diamond-tipped drill bit specifically designed for use on porcelain and other hard materials is crucial for this task. These bits are available in various sizes to accommodate different hole diameters. Read more about the different types of drill bits and discover diamond-tipped drill bits.
Variable speed drill: A drill with adjustable speed settings allows you to control the rotation speed, which is essential for preventing cracking and overheating. Find some variable speed cordless drills under $100 here.
Masking tape: Applying masking tape to the drilling area helps to prevent the drill bit from slipping and provides a visual guide for your drill placement.
Water or coolant: Using water or a specialized coolant during the drilling process helps to lubricate the drill bit, reduce friction, and prevent overheating, which can cause the porcelain to crack.
Preparation Steps: Drill Through Porcelain Tile Without Cracking
Before you begin drilling, it’s important to properly prepare the porcelain tile surface to minimize the risk of cracking:
Marking the drilling spot: Use a pencil or marker to carefully mark the exact spot where you need to drill the hole.
Applying masking tape: Place a piece of masking tape over the marked spot, ensuring that the mark is still visible. This will help to keep the drill bit in place and prevent it from wandering during the initial stages of drilling.
Using a pilot hole: For larger holes, it’s recommended to start with a smaller pilot hole before gradually increasing the drill bit size. This approach reduces the stress on the porcelain and lessens the likelihood of cracking.
Drilling Techniques: Step-By-Step Drilling Guide for Porcelain Tile Without Cracking
Now that you have your tools and materials ready and the porcelain tile prepared, it’s time to start drilling:
Setting the drill speed: Begin by setting your variable speed drill to a low speed, around 300-400 RPM. This slower speed reduces the risk of overheating and cracking the porcelain.
Applying gentle, even pressure: Position the drill bit perpendicular to the tile surface and apply gentle, even pressure as you begin drilling. Maintain a steady hand and avoid applying too much force, as this can cause the tile to crack.
Using water or coolant: As you drill, periodically dip the drill bit in water or apply a small amount of coolant to the drilling area. This helps to lubricate the bit, reduce friction, and prevent overheating, which can lead to cracking.
Tips to Avoid Cracking
In addition to the drilling techniques mentioned above, there are a few more precautions you can take to minimize the risk of cracking:
Patience and steady hand: Take your time and maintain a steady hand throughout the drilling process. Rushing or applying uneven pressure can result in cracking or chipping.
Checking progress regularly: Periodically stop drilling and check your progress. Ensure that the hole is straight and clean, and make any necessary adjustments to your technique.
Adjusting technique if necessary: If you notice any signs of cracking or chipping, stop drilling immediately and reassess your technique. You may need to adjust your drill speed, pressure, or coolant application.
Post-Drilling Care: Finishing The Job Safely
Once you’ve successfully drilled through the porcelain tile, there are a few final steps to ensure a clean and safe finish:
Removing masking tape: Carefully remove the masking tape from around the drilled hole, taking care not to chip or damage the edges of the hole.
Cleaning the drilled hole: Use a soft-bristled brush or compressed air to remove any debris or dust from the drilled hole. This will help to ensure a clean and smooth surface for any fittings or attachments.
Inspecting for cracks: Carefully inspect the area around the drilled hole for any signs of cracking or chipping. If you notice any damage, you may need to replace the tile or consult a professional for repair advice.
FAQs
Can I use a regular drill bit to drill through porcelain tile?
No, a regular drill bit is not suitable for drilling through porcelain tile. Porcelain is a dense and hard material that requires a diamond-tipped drill bit specifically designed for use on ceramic and porcelain surfaces. Using a regular drill bit can cause the tile to crack, chip, or shatter, and may also damage the drill bit itself.
Is it necessary to use water or coolant while drilling through porcelain tile?
Yes, using water or a specialized coolant is crucial when drilling through porcelain tile. The drilling process generates heat due to friction, which can cause the tile to crack or the drill bit to overheat. Applying water or coolant helps to lubricate the drill bit, reduce friction, and dissipate heat, minimizing the risk of damage to the tile and the drill bit.
What should I do if the tile starts to crack while drilling?
If you notice the tile starting to crack while drilling, stop drilling immediately. Continuing to drill may cause the crack to spread and potentially ruin the tile. Assess the damage and determine if the crack can be repaired or if the tile needs to be replaced. To prevent cracking in the future, ensure you are using the proper tools and techniques, and avoid applying excessive pressure while drilling.
Conclusion
Drilling through porcelain tile without cracking requires the right tools, techniques, and patience. By using a diamond-tipped drill bit, setting your drill to a low speed, applying gentle pressure, and using water or coolant, you can successfully create clean, precise holes in your porcelain tiles.
Remember to take your time, maintain a steady hand, and regularly check your progress to ensure the best results. With practice and adherence to these guidelines, you’ll be able to master the art of drilling through porcelain tile without causing any damage.
We hope this guide has been informative and helpful in your DIY endeavors. If you have any feedback or experiences to share, we’d love to hear from you in the comments section below. Happy drilling!


