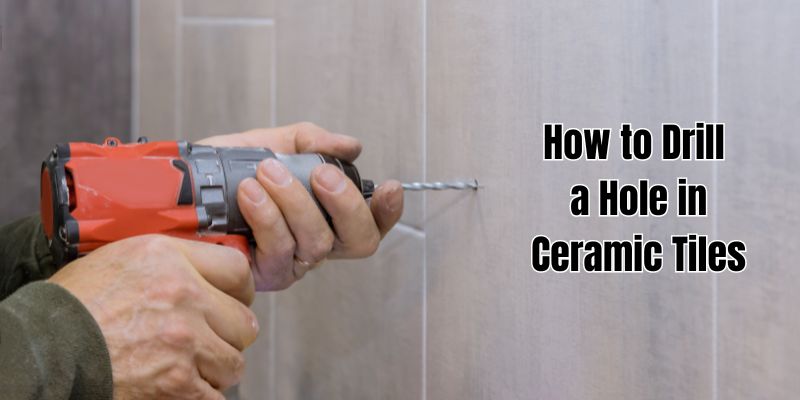
Drilling holes in ceramic tiles is a crucial skill for any DIY enthusiast or homeowner undertaking home improvement projects. Whether you’re installing new bathroom fixtures, mounting shelves, or hanging decorative items, the ability to accurately and safely drill through ceramic tiles is essential.
In this comprehensive guide, we’ll walk you through the process step by step, providing valuable tips and insights to help you achieve professional-looking results without damaging your tiles or injuring yourself. By the end of this guide, you’ll have the knowledge and confidence to tackle any ceramic tile drilling project with ease.

Understanding Ceramic Tiles
Before we dive into the drilling process, let’s take a moment to understand the different types of ceramic tiles and their unique characteristics. Ceramic tiles come in various sizes, thicknesses, and hardness levels, which can impact the drilling process. Some common types of ceramic tiles include:
Glazed ceramic tiles
These tiles have a smooth, glossy surface that provides a protective layer and enhances the tile’s appearance. Glazed tiles are more resistant to stains and scratches but can be more challenging to drill through due to the hardness of the glaze.
Unglazed ceramic tiles
Unglazed tiles have a matte finish and are more porous than glazed tiles. They offer better traction and are often used in outdoor or high-traffic areas. Drilling through unglazed tiles is generally easier, as they are softer and more forgiving.
Porcelain tiles
Porcelain tiles are a subtype of ceramic tiles that are denser, harder, and more durable. They are highly resistant to water, stains, and wear, making them ideal for high-moisture areas like bathrooms and kitchens. However, their hardness can make drilling more challenging, requiring specialized drill bits and techniques.
Read Here: How to Drill Through Porcelain Tile Without Cracking
Common scenarios where drilling holes in ceramic tiles is necessary include installing towel racks, soap dishes, or toilet paper holders in bathrooms; mounting shower heads or curtain rods; attaching shelves or hanging plants in kitchens; and creating decorative displays in living rooms or bedrooms.
Tools and Materials Required
To successfully drill holes in ceramic tiles, you’ll need the following tools and materials:
Essential tools
Drill (preferably a variable speed drill): A high-quality, variable speed drill allows you to control the drilling speed and pressure, reducing the risk of damaging the tile.
Carbide-tipped or diamond-tipped drill bits: These specialized drill bits are designed to penetrate hard materials like ceramic and porcelain without shattering the tile.
Masking tape: Applying masking tape to the drilling area helps create a non-slip surface, preventing the drill bit from wandering and minimizing the risk of chipping.
Lubricant (e.g., water or cutting oil): Lubricating the drill bit helps reduce friction, prevent overheating, and minimize dust production during the drilling process.
Safety equipment
Safety goggles: Protect your eyes from flying debris and ceramic dust by wearing safety goggles throughout the drilling process.
Dust mask: Inhaling ceramic dust can be harmful to your health. Wear a dust mask to avoid breathing in fine particles generated during drilling.
Gloves: Wearing gloves protects your hands from sharp edges and potential injuries while handling tiles and tools.
Preparing for the Drilling Process
Proper preparation is key to achieving a successful and clean drilling result. Follow these steps to prepare your work area and the tile surface:
Clean the tile surface: Ensure the area around the drilling point is clean and free from debris, dirt, or grease. Use a damp cloth or sponge to wipe the surface, and allow it to dry completely.
Secure the tile: If the tile is loose or not firmly attached to the wall or floor, secure it using a clamp or adhesive to prevent movement during drilling. This step is crucial to avoid cracking or chipping the tile.
Measure and mark the drilling point: Using a measuring tape and a pencil, carefully measure and mark the exact spot where you need to drill the hole. Double-check your measurements to ensure accuracy.
Apply masking tape: Place a piece of masking tape over the marked drilling point. This creates a non-slip surface for the drill bit, reducing the risk of slippage and helping to prevent chipping or cracking around the hole’s edges.
Selecting the Appropriate Drill Bit
Choosing the right drill bit is crucial for successfully drilling through ceramic tiles without causing damage. The two most suitable types of drill bits for ceramic tiles are:
Carbide-tipped drill bits: These drill bits have a sharp, durable carbide tip that can penetrate softer ceramic tiles without shattering them. They are a good choice for most ceramic tile drilling applications and are widely available at hardware stores.
Diamond-tipped drill bits: For harder, denser tiles like porcelain, diamond-tipped drill bits are the best option. These bits feature a diamond-coated tip that can grind through even the toughest materials without causing cracks or chips. However, they are more expensive than carbide-tipped bits and may require more skill to use effectively.
When selecting the appropriate drill bit size, consider the diameter of the hole you need to create. Measure the size of the screw, anchor, or fixture you plan to insert into the hole, and choose a drill bit that is slightly smaller than that diameter. This ensures a snug fit and reduces the risk of damaging the tile.
Drilling Techniques for Ceramic Tiles
Now that you have the necessary tools and have prepared your work area, it’s time to start drilling. Follow this step-by-step guide to ensure a successful and damage-free drilling process:
Start with a low speed: Begin drilling at a low speed, applying gentle pressure to create a small pilot hole. This helps prevent the drill bit from slipping or wandering and reduces the risk of cracking the tile.
Gradually increase speed and pressure: As the pilot hole deepens, slowly increase the drill speed and apply more pressure. Maintain a steady, controlled pace to avoid overheating the drill bit or putting too much stress on the tile.
Apply lubricant: To reduce friction and heat generation, apply a small amount of lubricant (water or cutting oil) to the drill bit and the drilling area. This also helps minimize ceramic dust production and keeps the drill bit cool.
Use a 45-degree angle initially: When starting the hole, hold the drill at a 45-degree angle to the tile surface. This technique helps prevent the drill bit from slipping and minimizes the risk of chipping the tile’s surface. As the hole deepens, gradually straighten the drill to a 90-degree angle.
Drill through the tile: Continue drilling at a steady pace until the drill bit penetrates the tile completely. Be careful not to apply too much pressure, as this can cause the tile to crack or shatter.
Helpful tips
- Use a piece of scrap wood: Place a piece of scrap wood behind the tile you’re drilling. This provides support, prevents the tile from cracking as the drill bit exits, and ensures a clean hole on the back side of the tile.
- Take breaks: If drilling multiple holes or working with particularly hard tiles, take brief breaks to allow the drill bit to cool down and prevent overheating.
Troubleshooting Common Issues
Even with careful preparation and technique, you may encounter some common issues while drilling ceramic tiles. Here are a few problems you might face and how to address them:
Tile cracking or chipping
Causes: Applying too much pressure, using the wrong drill bit, or not securing the tile properly.
Solutions: Use a carbide-tipped or diamond-tipped drill bit suitable for your tile type, apply gentle pressure, and ensure the tile is firmly secured before drilling.
Drill bit slipping or wandering
Causes: Not using masking tape, starting at a high speed, or applying too much pressure.
Solutions: Apply masking tape to create a non-slip surface, start drilling at a low speed, and maintain a steady, controlled pace.
Difficulty starting the hole
Causes: Drill bit not sharp enough, not using a pilot hole, or applying too much pressure.
Solutions: Use a sharp, high-quality drill bit suitable for ceramic tiles, start with a pilot hole at a 45-degree angle, and apply gentle pressure until the hole is established.
Safety Precautions
When drilling ceramic tiles, prioritizing safety is essential to avoid injuries and minimize health risks. Follow these safety guidelines:
Wear protective gear: Always wear safety goggles to protect your eyes from flying debris and dust. Use a dust mask to avoid inhaling fine ceramic particles, and wear gloves to protect your hands from sharp edges and potential injuries.
Ensure proper ventilation: Drill in a well-ventilated area or use a vacuum attachment to minimize the spread of ceramic dust. Inhaling ceramic dust can cause respiratory issues, so it’s crucial to maintain good air quality in your work area.
Handle tools with care: Keep your tools clean and in good condition. Inspect your drill bits regularly for signs of wear or damage, and replace them when necessary. Store your tools safely and out of reach of children or pets.
Maintain a clean work area: Keep your work area clean and organized to prevent trips, slips, or falls. Clean up any debris, dust, or water immediately to avoid potential hazards.
Finishing and Cleaning Up
After successfully drilling the hole in your ceramic tile, it’s important to properly finish the job and clean up your work area:
Remove debris: Use compressed air or a soft brush to remove any debris or dust from the drilled hole. This ensures a clean and smooth surface for installing your fixtures or anchors.
Inspect the hole: Carefully examine the drilled hole to ensure it meets the required size and shape. If necessary, use a larger drill bit to slightly enlarge the hole or smooth out any rough edges with a file or sandpaper.
Install fixtures or anchors: Once the hole is clean and properly sized, install your desired fixtures, anchors, or screws. Make sure they fit securely and don’t put too much stress on the surrounding tile.
Clean the work area: Use a damp cloth or sponge to wipe away any remaining dust or debris from the tile surface and surrounding area. Dispose of any waste materials, such as masking tape or wood scraps, in an appropriate manner.
Clean your tools: After completing your project, clean your drill bits and other tools with a brush or cloth to remove any ceramic dust or debris. Store them properly to maintain their quality and prolong their lifespan.
Final Thoughts
Drilling holes in ceramic tiles may seem intimidating at first, but with the right tools, techniques, and safety precautions, anyone can achieve professional-looking results. By following the steps outlined in this guide, you’ll be able to confidently tackle any ceramic tile drilling project, whether you’re a seasoned DIY enthusiast or a beginner.
Remember to select the appropriate drill bit for your tile type, prepare your work area carefully, and use a steady, controlled drilling technique to minimize the risk of damage. Always prioritize safety by wearing protective gear and maintaining a clean, organized work space.
With practice and patience, you’ll soon master the art of drilling ceramic tiles and be able to take on a wide range of home improvement projects with ease. Happy drilling!


