Rust can quickly turn your valuable tools into useless pieces of metal. When rust attacks your drill bits, nuts, and bolts, it doesn’t just make them look bad – it can stop them from working completely. This is a common problem that many tool owners face, whether they’re home DIY enthusiasts or professional mechanics.
The good news is that you don’t need to throw away your rusty tools. With the right methods and some careful work, you can bring them back to life. In this guide, you’ll learn exactly how to remove rust from your drill bits, nuts, and bolts using proven techniques that really work. We’ll look at both simple home methods and more advanced solutions, giving you all the information you need to tackle rust problems of any size.
Understanding Rust
Rust is a natural process that occurs when metal, particularly iron or steel, is exposed to oxygen and moisture over time. The chemical reaction that takes place forms iron oxide, commonly known as rust. Left untreated, rust can eat away at the surface of your tools, making them brittle, difficult to use, or even dangerous.
What Causes Rust?
Rust primarily forms due to the interaction between metal, water, and oxygen. When tools are stored in damp environments, such as garages or sheds, the combination of moisture and air leads to oxidation. This is why it’s common to find rust on metal objects that are left outside or in unsealed spaces.
Types of Rust Damage
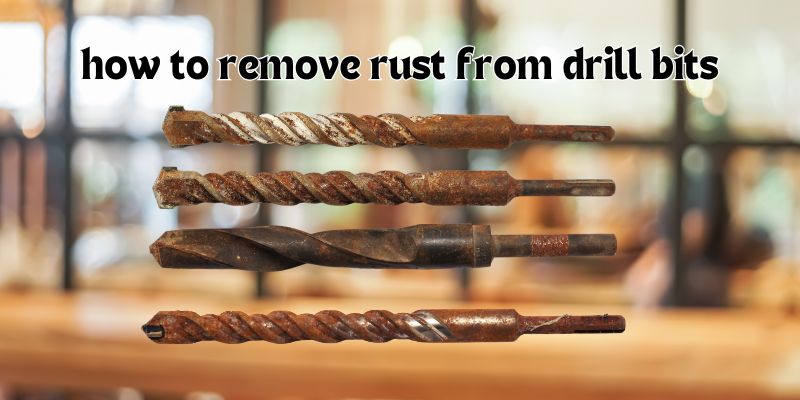
Rust can appear as light surface discoloration or deep pitting, depending on how long it’s been forming. Light rust is easy to clean off with basic methods, but deeper rust, which causes pits or holes in the metal, can weaken the structure of the tool.
Common Problem Areas
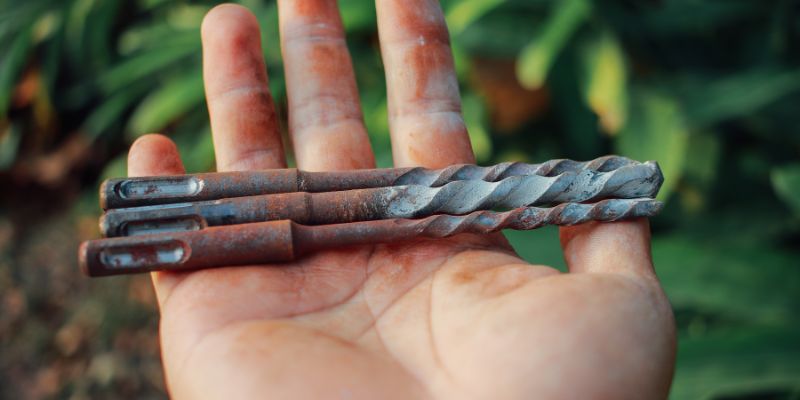
Drill bits, nuts, and bolts are especially prone to rust because they are frequently exposed to moisture and friction. Nuts and bolts often go unnoticed until they start sticking or seizing up, while drill bits can accumulate rust when left in storage without proper protection.
Early Detection
It’s always better to catch rust early. Regularly inspecting your tools for signs of rust can prevent deeper damage. Look for reddish-brown spots on the metal, which may indicate early-stage rust, and address them immediately to avoid further degradation.
Methods for Removing Rust from Drill Bits, Nuts, and Bolts
There are several proven techniques to remove rust from drill bits, nuts, and bolts. These can be categorized into chemical methods, mechanical methods, and professional solutions. Depending on the severity of the rust, you can choose the method that best suits your needs.
Chemical Methods
Vinegar Soak
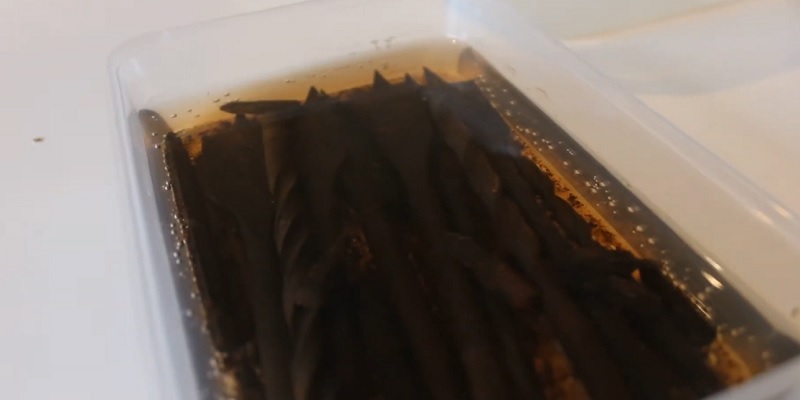
One of the simplest and most affordable ways to remove rust is to soak the rusty tool in white vinegar. The acetic acid in vinegar reacts with rust, dissolving it over time. Submerge your rusted drill bits, nuts, or bolts in vinegar for several hours or overnight. After soaking, scrub the surface with a brush or steel wool to remove any remaining rust.
Commercial Rust Removers
There are many commercial rust-removing products available that can speed up the process. These often contain stronger acids, such as phosphoric or oxalic acid, which break down rust more quickly than vinegar. Follow the instructions on the product label for safe use, and always wear gloves and protective eyewear.
Penetrating Oils
Penetrating oils, like WD-40, are another popular solution for loosening rusted nuts and bolts. These oils seep into the cracks and crevices of metal surfaces, breaking the bond between the rust and the metal. Spray the oil generously on the rusted part and allow it to sit for a few minutes before wiping or scrubbing it away.
Citric Acid Solution
Citric acid, found in lemons or purchased in powdered form, can also be used to remove rust. Dissolve the citric acid in warm water and soak the rusted parts for a few hours. Like vinegar, citric acid works by breaking down rust through a chemical reaction. After soaking, scrub the item with a brush or abrasive pad.
Mechanical Methods
Wire Brushing
For surface rust that hasn’t penetrated too deeply, wire brushing is an effective option. A stiff wire brush can be used to manually scrub off the rust from drill bits, nuts, and bolts. This method is ideal for small tools and is a quick way to remove rust without using chemicals.
Sandpaper
For more stubborn rust, you can use sandpaper to rub it away. Coarse grit sandpaper (like 80 or 100 grit) is suitable for tougher rust, while finer grit (like 200 or 300) is better for lighter rust or finishing touches. The key is to work gradually, making sure you don’t scratch or damage the surface of the tool too much.
Steel Wool
Steel wool works similarly to sandpaper but offers more control, especially for small, intricate parts. It’s excellent for polishing drill bits and smaller nuts and bolts. Start with coarse steel wool for heavy rust, then switch to finer grades for a smoother finish.
Power Tool Attachments
If you’re dealing with extensive rust, consider using power tools like a rotary tool or angle grinder with a wire brush attachment. These tools make quick work of rust removal on larger surfaces. Just be careful not to apply too much pressure, as this could damage the underlying metal.
Professional Solutions
Electrolysis
Electrolysis is a more advanced rust-removal method that involves using electricity to separate rust from metal. This method is particularly useful for heavily rusted items and can restore them to near-original condition. However, it requires specific equipment, such as a power source and a non-metallic container, so it’s often used by professionals or serious DIYers.
Ultrasonic Cleaning
In some cases, ultrasonic cleaning is used to remove rust from delicate or complex metal parts. This process uses high-frequency sound waves in a cleaning solution to break apart rust and dirt. It’s an excellent choice for intricate items like small nuts and bolts that would be difficult to clean by hand.
Chemical Dips
For industrial-level rust removal, chemical dips are used to submerge entire parts into a rust-dissolving solution. This process is quick and efficient but should only be handled by professionals due to the strong chemicals involved.
Step-by-Step Guide- How to Remove Rust from Drill Bits
Assessment
Before you start removing rust, it’s essential to assess the severity of the rust on your tools.
Identifying Rust Severity: Take a close look at the affected parts. If the rust is superficial and only affects the surface, basic methods like vinegar or wire brushing will suffice. However, if the rust has penetrated deeper into the metal, stronger chemical or mechanical methods may be necessary.
Choosing the Appropriate Method: Once you’ve identified the severity, decide which method will work best. For light rust, start with chemical methods like a vinegar soak or WD-40. For heavier rust, you may need to resort to power tools or a commercial rust remover.
Required Materials: Gather the necessary supplies based on the method you’ve chosen. You’ll typically need vinegar, penetrating oil, wire brushes, sandpaper, and safety gear like gloves and protective eyewear.
Preparation
Before starting the rust removal process, it’s essential to prepare both your workspace and your tools to ensure a safe and effective experience.
Safety Measures: Rust removal often involves the use of chemicals and abrasive tools, so it’s important to take appropriate safety precautions. Wear protective gloves to shield your hands from chemicals and sharp edges. If you’re using any form of rust remover or penetrating oil, ensure that your workspace is well-ventilated to avoid inhaling fumes. For mechanical methods, wear safety goggles to protect your eyes from flying debris or rust particles.
Workspace Setup: Set up a clean, flat workspace where you can comfortably handle your tools. A workbench or table covered with a protective layer (like an old cloth or tarp) will keep the surface from being damaged by chemicals or scratches. Make sure you have adequate lighting to spot any rust spots clearly.
Tool Organization: Before beginning, organize all the materials and tools you’ll need. Gather rust removers, brushes, steel wool, sandpaper, and any protective coatings for post-treatment. Having everything within arm’s reach will make the process more efficient.
Rust Removal Process
Now that your workspace is prepared, it’s time to dive into the rust removal process.
1. Initial Cleaning
Before applying any rust removal treatment, start by cleaning the tool with soap and water to remove any dirt, grease, or debris. This step helps the rust remover or abrasive materials work more effectively by giving them direct access to the rust. Dry the tool completely before proceeding.
2. Treatment Application
Depending on the method you’ve chosen, apply your rust remover or cleaning solution:
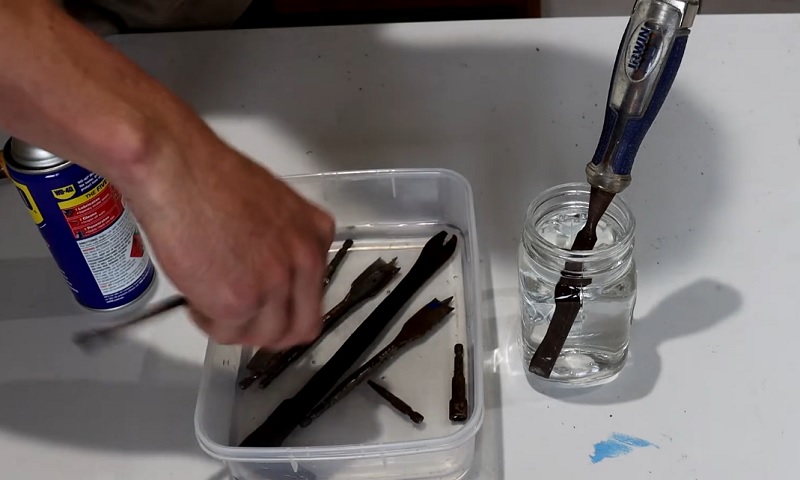
- Vinegar Soak: Submerge the rusted part in a container filled with vinegar. Let it soak for several hours or overnight, depending on the severity of the rust.
- Penetrating Oil: Spray the oil onto the rusted areas and allow it to penetrate for a few minutes.
- Commercial Rust Remover: Follow the product instructions, applying the remover evenly over the rusted surfaces.
3. Dwell Time
Allow the rust remover to sit and do its job. For vinegar or chemical solutions, a soak time of 6-12 hours is typical, but heavily rusted parts may need more time. Check periodically to see if the rust is loosening. For penetrating oils or commercial removers, a dwell time of 10-15 minutes is usually sufficient before moving on to the next step.
4. Mechanical Removal
Once the chemical treatment has had time to work, it’s time to remove the rust mechanically:
- Wire Brush: Scrub the rusted areas with a wire brush to break off any loose rust particles.
- Steel Wool or Sandpaper: For more stubborn rust, use steel wool or sandpaper. Work gently but firmly, starting with a coarse grade and moving to finer grades for a smooth finish.
- Power Tool Attachments: If you’re using a power tool attachment (like a rotary tool with a wire brush), be cautious not to apply too much pressure, which can damage the metal.
5. Final Cleaning
Once the rust is removed, rinse the tool with water to remove any remaining residue from the chemicals or rust particles. If you’ve used a chemical rust remover, be sure to neutralize the surface with baking soda and water to prevent further reactions. Dry the tool thoroughly with a clean cloth.
Post-Treatment
After removing the rust, it’s essential to properly treat and protect the tool to prevent future rust formation.
Drying Process
Ensure the tool is completely dry after cleaning. Any remaining moisture can lead to new rust forming almost immediately. Use a cloth to wipe away any water, and allow the tool to air dry in a low-humidity environment for several hours.
Protective Coating
Applying a protective coating is one of the best ways to prevent future rust. Here are some options to consider:
- WD-40 or Penetrating Oil: Lightly spray the tool with a rust-inhibiting oil, like WD-40, to create a protective barrier against moisture.
- Paste Wax: For a more long-term solution, consider using paste wax. Apply a thin layer to the metal surface and buff it to a shine. This method is ideal for hand tools like drill bits or small nuts and bolts.
- Rust-Inhibiting Spray: There are several rust-preventing sprays available that offer long-lasting protection. These are ideal for tools that will be stored in areas prone to moisture.
See this video Tutorial
Storage Recommendations
Storing your tools correctly is crucial for preventing rust. Keep them in a dry environment, ideally with temperature control, to minimize moisture exposure. Use toolboxes, wall-mounted organizers, or drawer liners to keep tools off the ground and away from potential dampness. Consider placing silica gel packets inside toolboxes or drawers to absorb excess moisture.
Prevention Tips
Now that you’ve restored your tools, preventing rust from reoccurring is key to ensuring their longevity. Here are some practical prevention methods:
Proper Storage Techniques
- Store tools in dry, cool spaces to reduce moisture exposure.
- Invest in toolboxes with seals or weather-resistant coatings to protect tools from humidity.
- Use plastic bins or drawer liners to keep tools off potentially damp surfaces.
Moisture Control
- Consider placing dehumidifiers in your workshop or garage to maintain low humidity levels.
- Silica gel packets can absorb moisture inside enclosed spaces like toolboxes.
- Keep tools away from direct water sources, such as sinks or hoses.
Preventive Coatings
- Regularly apply light coatings of oil or rust-preventing sprays to tools that are used infrequently.
- For tools like nuts and bolts, storing them in airtight containers with moisture absorbers can add an extra layer of protection.
Regular Maintenance Schedule
- Clean and inspect your tools regularly, wiping them down after each use to remove dirt, grime, and any moisture.
- Develop a maintenance routine that includes applying protective coatings or lubricants to tools every few months, especially during humid seasons.
Troubleshooting
Even with the best care, you may encounter challenges when dealing with rust. Here are a few troubleshooting tips:
Common Challenges
- Deep Pitting: If rust has eaten deep into the metal, leaving pits or holes, it may not be possible to restore the tool to its original condition. In these cases, sand the area as smooth as possible and apply a protective coating.
- Stubborn Rust: If rust is difficult to remove, repeat the chemical or mechanical treatment until all visible rust is gone. Multiple rounds of treatment may be necessary for severe cases.
Read Also: How to Remove Rusted Screws
When to Replace vs. Restore
If rust has severely weakened the structure of a tool—such as when a drill bit’s edge is dulled beyond repair or a bolt’s thread is corroded—replacement may be the better option. Tools that are essential for precision work should be replaced if rust has compromised their performance.
Professional Intervention Indicators
In some cases, professional services such as electrolysis or ultrasonic cleaning may be required, especially for valuable or delicate tools. If you are unsure about how to proceed, or if the tool is critical to your work, seeking expert help might save you from damaging the tool further.
Product Recommendations
Here are a few highly recommended products that can help you with rust removal and prevention:
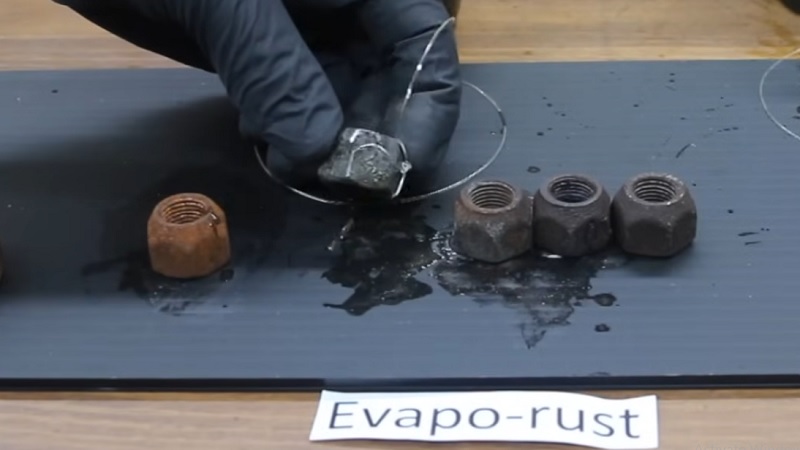
Evapo-Rust Super Safe Rust Remover: This non-toxic and environmentally friendly solution is highly effective at removing rust without damaging the metal.
WD-40 Specialist Rust Release Penetrant Spray: Great for loosening stubborn rust on nuts, bolts, and other fasteners, this product is a household staple.
3M Sandblaster Sandpaper (60-320 Grit): Ideal for mechanical rust removal, this sandpaper set provides a range of grits for all stages of rust removal.
Boeshield T-9 Rust & Corrosion Protection: This protective spray is perfect for long-term rust prevention and is easy to apply after cleaning.
Conclusion
Removing rust from drill bits, nuts, and bolts doesn’t have to be a daunting task. With the right methods, tools, and preventive measures, you can restore your tools and keep them in excellent working condition for years to come. Whether you’re using common household items like vinegar or commercial products, the key is to address rust early and consistently maintain your tools. Proper storage, regular cleaning, and applying protective coatings will go a long way in keeping rust at bay.
By following the step-by-step guide provided here, you can tackle even the toughest rust and ensure that your drill bits, nuts, bolts, and other tools remain reliable and ready for use.


