Caulking is an essential skill for any homeowner or DIY enthusiast. It involves sealing gaps, cracks, and joints between surfaces to prevent air, water, and pest infiltration. Caulking not only improves the appearance of your home but also helps maintain its structural integrity and energy efficiency.
In this comprehensive guide, we’ll cover everything beginners need to know about caulking, including tools and materials, techniques, and tips for achieving professional-looking results.
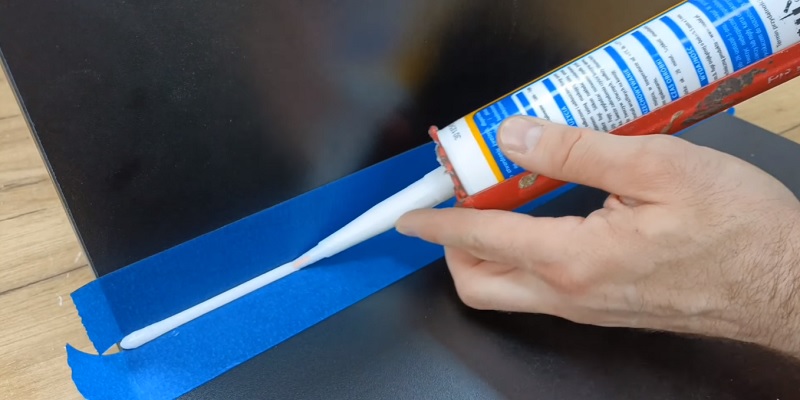
What is Caulking?
Caulking is the process of applying a flexible sealant to gaps and cracks in various surfaces, such as walls, windows, doors, and trim. The sealant, called caulk, adheres to surfaces to create a watertight, airtight, and pest-proof barrier. Different formulations of caulk are designed for specific applications and materials.
Why is Caulking Important?
Caulking serves several crucial functions in home maintenance and improvement:
Prevents water damage: Sealing gaps around windows, doors, and plumbing fixtures prevents water from seeping into walls and causing rot, mold, and mildew.
Improves energy efficiency: Eliminating drafts and air leaks helps keep your home better insulated and reduces energy costs.
Enhances appearance: Filling unsightly gaps and cracks creates a seamless, finished look.
Deters pests: Sealing entry points helps prevent insects and small animals from invading your home.
Common Uses for Caulk
Caulk is versatile and can be used in various applications, such as:
- Sealing gaps around windows and doors
- Filling cracks in walls and ceilings
- Sealing joints between countertops and backsplashes
- Waterproofing around sinks, tubs, and showers
- Filling gaps in wood trim and molding
Tools and Materials Needed for Caulking
Before you begin caulking, it’s important to gather all the necessary tools and materials to ensure a smooth and efficient process:
Caulking gun: A caulking gun is essential for holding and dispensing caulk tubes. It provides better control and allows for a consistent application, ensuring an even bead of caulk.
Caulk: Select the appropriate type of caulk for your specific project. Whether it’s silicone, latex, hybrid, or acrylic latex caulk, choosing the right one ensures the durability and effectiveness of your seal.
Utility knife or scissors: These tools are used to cut the nozzle of the caulk tube to the desired size, allowing for precise application. A clean cut helps in controlling the flow of caulk.
Painter’s tape: Applying painter’s tape along the edges of the area to be caulked helps create clean, straight lines and prevents messes. This is especially useful for beginners or when working in visible areas where a neat finish is important.
Damp cloth or sponge: Keep a damp cloth or sponge handy for cleaning up excess caulk immediately after application. This helps in maintaining a tidy workspace and ensures that the caulk lines are neat.
Rubbing alcohol: Use rubbing alcohol to remove old caulk and clean surfaces before applying new caulk. Proper surface preparation is crucial for good adhesion and a long-lasting seal.
Having these tools and materials ready before starting your caulking project will make the process more efficient and help achieve a professional-looking result.
Types of Caulk
Understanding the different types of caulk is essential for choosing the right one for your specific project needs. Here are some common types of caulk and their ideal applications:
Silicone caulk
Silicone Caulk is ideal for high-moisture areas such as bathrooms, toilet bases and kitchens. It is known for its waterproof and flexible properties, making it perfect for places prone to water exposure. However, it can be challenging to smooth and cannot be painted over, which may limit its use in visible areas where aesthetics matter.
Read More In-depth: What Type of Caulk for Toilet Base?
Latex caulk
Latex Caulk is appreciated for its ease of application and smooth finish, making it a popular choice for DIY enthusiasts. One of its major advantages is that it can be painted over, allowing it to blend seamlessly with the surrounding surfaces. It cleans up easily with water, reducing the mess involved in the application process. Latex caulk is best used in low-moisture areas and for interior projects where water exposure is minimal.
Hybrid caulk
Hybrid Caulk combines the best qualities of both silicone and latex. It offers the flexibility and waterproof benefits of silicone while retaining the ease of application and paintability of latex. This makes it versatile for both interior and exterior uses. Additionally, hybrid caulk provides strong adhesion to various surfaces, ensuring a durable and long-lasting seal.
Acrylic latex caulk
Acrylic Latex Caulk is similar to latex caulk but with added durability and adhesion, making it ideal for exterior applications. Its enhanced formulation allows it to withstand weather conditions, making it perfect for outdoor projects. Like latex caulk, it can also be painted to match the surrounding area, providing a clean and professional finish. This type of caulk is versatile and suitable for a variety of surfaces and conditions, ensuring a reliable and durable seal.
Preparing the Surface for Caulking
Proper preparation ensures optimal adhesion and durability.
Cleaning the Area
Use a clean, damp cloth to remove any dirt, dust, or debris from the surface. For tougher grime, use a mild detergent solution and allow the surface to dry completely.
Removing Old Caulk
If you’re re-caulking an area, use a utility knife or caulk removal tool to carefully scrape away the old caulk. Remove any residue and debris to create a clean, smooth surface.
Ensuring a Dry Surface
Caulk should only be applied to dry surfaces. If the area is damp, use a hairdryer or wait for it to dry naturally.
How to Caulk Like a Pro: Step-by-Step Guide
Loading the Caulking Gun
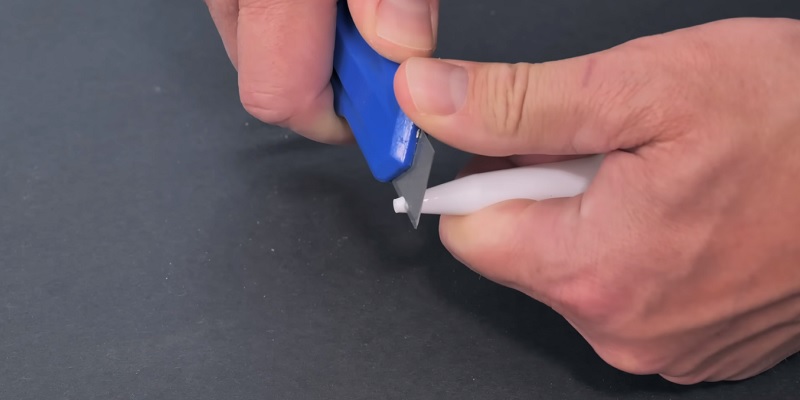
- Cut the nozzle of the caulk tube at a 45-degree angle to control the flow of the caulk more precisely.
- Use a long nail or the puncture tool on the caulking gun to pierce the inner seal of the caulk tube.
- Place the caulk tube into the gun, making sure it is securely seated. Squeeze the trigger a few times to begin dispensing the caulk and to ensure the tube is properly loaded.
Applying Steady Pressure
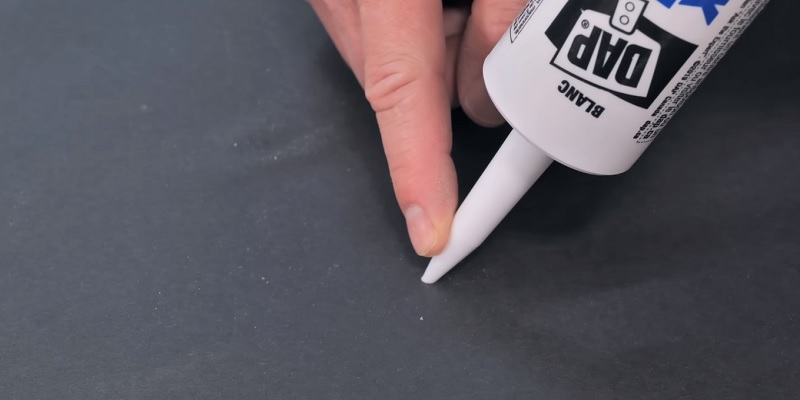
- Position the gun at a 45-degree angle to the joint or gap you are caulking.
- Apply consistent pressure to the trigger while moving the gun steadily along the gap.
- Keep a consistent speed and pressure to ensure an even bead of caulk. This prevents gaps and excess caulk buildup.
Creating a Smooth Bead
- After applying the caulk, immediately use a caulk smoothing tool or your finger (dipped in water or rubbing alcohol) to smooth the bead.
- Smooth the caulk in one continuous motion for a professional finish, ensuring that the caulk adheres well to the surfaces.
Cleaning Up Excess Caulk
- Use a damp cloth or sponge to remove any excess caulk before it dries.
- Use water for cleaning latex caulk and rubbing alcohol for silicone caulk.
Caulking Wood
Choosing the Right Caulk for Wood
- Interior wood: Use a paintable latex or acrylic latex caulk for indoor woodwork. These caulks provide a smooth finish that can be painted to match the trim or surface.
- Exterior wood: For outdoor wood applications, choose a high-quality, flexible, and weatherproof caulk such as silicone or a hybrid caulk. These types withstand weather changes and provide a durable seal.
Filling Gaps and Cracks
- Using a caulking gun or a squeezable tube, apply the caulk to the gaps and cracks in the wood.
- Make sure the caulk is evenly applied and fills the gaps completely. Smooth the bead with a tool or your finger for a clean finish.
Caulking Wood Trim
- Apply painter’s tape along the edges of the area to be caulked to create clean lines and prevent mess.
- Apply the caulk, then smooth it with a smoothing tool or your finger. Remove the painter’s tape before the caulk dries to ensure clean edges.
Painting Over Caulk
Most latex and acrylic latex caulks are paintable. Allow the caulk to dry completely according to the manufacturer’s instructions before painting over it. This ensures proper adhesion and a seamless finish.
How to Caulk Without Making a Mess
Using Painter’s Tape
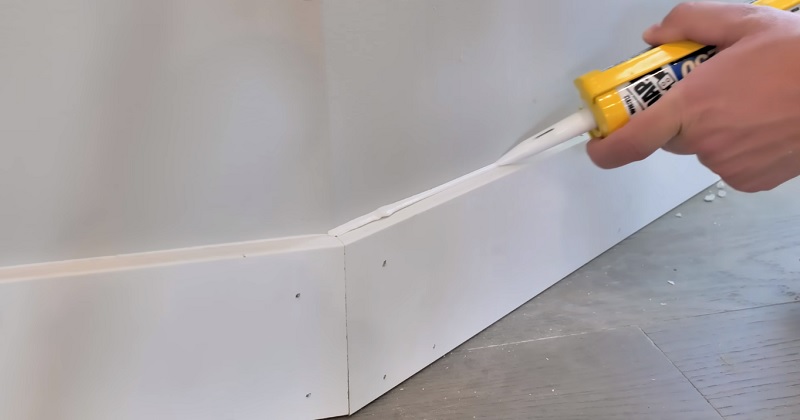
Apply painter’s tape along the edges of the area you’ll be caulking. This creates clean lines and prevents caulk from getting on unwanted surfaces.
Smoothing Techniques
Use a caulk smoothing tool, your finger, or a damp sponge to smooth the caulk immediately after application. Keep a damp cloth nearby to clean up any excess.
Cleaning Up Immediately
Clean up any messes with a damp cloth or sponge as soon as possible. Do not let excess caulk dry on surfaces or tools.
How to Caulk a Wall?
Identifying Areas That Need Caulking
Inspect your walls for gaps, cracks, and joints that require caulking. Common areas include the joints between walls and trim, corners, and where walls meet the ceiling.
Preparing the Wall Surface
Clean the wall surface with a damp cloth and allow it to dry completely. Remove any old caulk, paint, or debris to create a smooth, clean surface.
Applying Caulk to Wall Joints
Use a caulking gun or squeezable tube to apply the caulk to the wall joints, ensuring even coverage and a smooth bead.
Smoothing and Finishing
Use a caulk smoothing tool, your finger, or a damp sponge to smooth the caulk immediately after application. Remove any excess caulk with a damp cloth before it dries.
Caulking Without a Gun
For smaller projects or touch-ups, you can caulk without a caulking gun. Here’s how to do it effectively:
Cut the Nozzle
Begin by cutting the nozzle of the caulk tube at a 45-degree angle. This angle allows you to control the flow of caulk more precisely, making it easier to apply an even bead.
Apply Steady Pressure
Hold the caulk tube firmly in your hands and apply steady pressure to dispense the caulk. Squeeze the tube slowly to ensure a consistent and even bead. Maintaining a steady pressure helps avoid any sudden bursts of caulk, which can create a mess.
Use a Smoothing Tool or Finger
Immediately after applying the caulk, use a caulk smoothing tool or your finger to smooth and shape the bead. Dipping your finger in water or rubbing alcohol before smoothing can help achieve a cleaner finish. This step is crucial for creating a neat appearance and ensuring the caulk adheres properly to the surfaces.
Clean Up Excess Caulk
Wipe away any excess caulk with a damp cloth or sponge before it dries. Cleaning up immediately helps avoid hardened caulk, which can be difficult to remove and may affect the final look of your project.
While using a caulking gun provides better control and is recommended for larger projects, caulking without a gun is a viable option for minor repairs and small gaps.
Caulking Hacks
These clever hacks will help you achieve professional-looking caulking results with ease:
Using a Caulk Smoothing Tool: A caulk smoothing tool helps create a smooth, even bead and removes excess caulk in one motion.
Applying Caulk with a Plastic Bag: For small touch-ups or hard-to-reach areas, put some caulk in a plastic bag, cut a small hole in the corner, and squeeze the caulk out like a piping bag.
Using a Damp Sponge for Smoothing: A slightly damp sponge can be used to smooth caulk and remove excess, creating a neat, even finish.
Storing Partially Used Caulk Tubes: Seal the nozzle with a small piece of tape or a caulk saver cap. Store the tube in a cool, dry place away from direct sunlight.
How to Caulk Trim
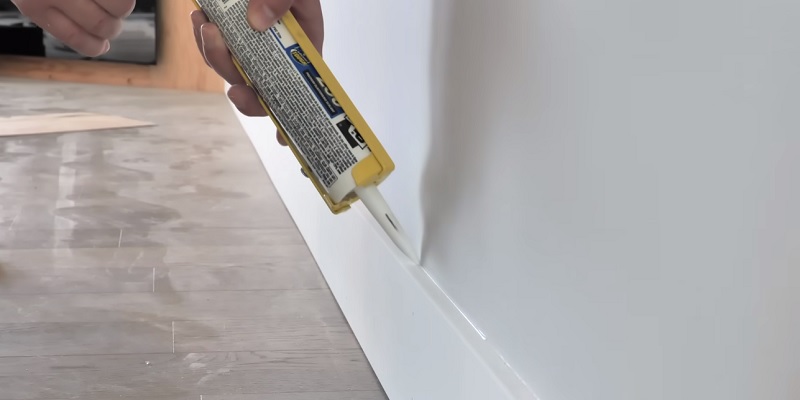
Properly caulking trim can enhance the appearance and longevity of your trim work. Follow these steps to ensure a clean and effective caulking job:
Preparing the Trim Surface
Start by cleaning the trim surface with a damp cloth to remove any dust, dirt, or debris. It’s crucial to allow the surface to dry completely before proceeding. If there is any old caulk, paint, or debris, use a utility knife or a scraper to carefully remove it. Ensuring a clean and dry surface will help the new caulk adhere better and create a stronger seal.
Applying Caulk to Gaps and Joints
Using a caulking gun or a squeezable tube, apply the caulk to the gaps and joints between the trim and the wall. Aim for even coverage, ensuring the caulk fills the gaps completely. To achieve a smooth bead, maintain a consistent pressure on the caulking gun and move steadily along the gap. This step is essential for preventing air and moisture infiltration, which can lead to damage over time.
Smoothing and Shaping the Caulk
Immediately after applying the caulk, use a caulk smoothing tool, your finger, or a damp sponge to smooth and shape the bead. This not only gives the caulk a professional appearance but also helps it adhere better to the surfaces. Wipe away any excess caulk with a damp cloth before it dries, as dried caulk can be difficult to remove and can affect the finish of your trim.
Painting Over Caulked Trim
If you’re using latex or acrylic latex caulk, you’ll be able to paint over it to match the trim and surrounding walls. Allow the caulk to dry completely according to the manufacturer’s instructions before painting. This ensures that the paint adheres properly and provides a seamless, polished look to your trim work.
Caulking Tips and Tricks
Allowing Proper Drying Time: Always allow caulk to dry completely before painting, exposing it to water, or applying pressure. Refer to the manufacturer’s instructions for recommended drying times.
Maintaining Consistent Pressure and Speed: When using a caulking gun, maintain consistent pressure on the trigger and move at a steady speed to ensure an even bead.
Practicing on Scrap Material: Before tackling a major caulking project, practice your technique on scrap material or an inconspicuous area to get a feel for the process.
Regularly Maintaining Caulked Areas: Inspect caulked areas regularly for signs of wear, damage, or separation. Re-caulk as needed to maintain a watertight, airtight, and pest-proof seal.
Final Words
Caulking is a valuable skill for any homeowner or DIY enthusiast, helping to improve the appearance, efficiency, and durability of your home. By following the tips, tricks, and techniques outlined in this guide, beginners can achieve professional-looking results and tackle a variety of caulking projects with confidence. Remember to choose the right type of caulk for your project, prepare surfaces properly, and use the appropriate tools and techniques for application and smoothing. With practice and patience, you’ll soon master the art of caulking and enjoy the many benefits it provides for your home.


