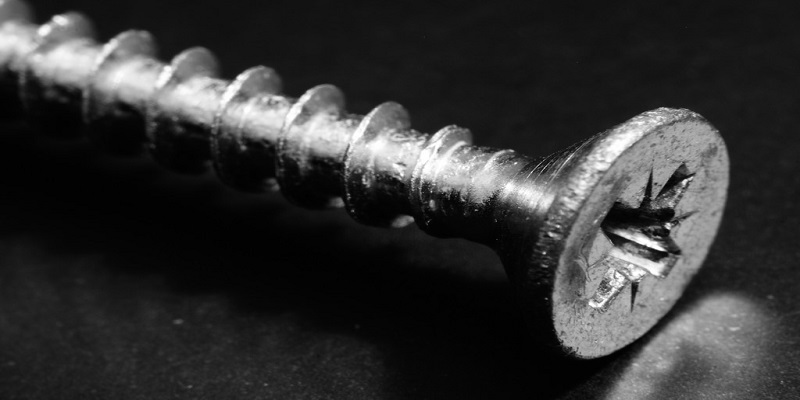
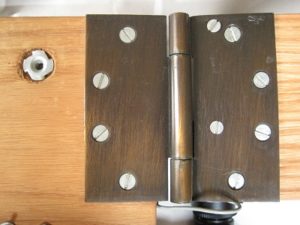
Sometimes, you may need to fix a screw in wood for household or domestic purposes. This is often necessary for repairing door pivots, hangers, or various other items such as tables, cabinets, and old dressers that have interlocking joints.
Wood projects often rely on screws to join components securely. However, screws can loosen over time due to factors like vibration, shifting, improper installation, or weakening of the wood fibers. Loose screws negatively impact the stability and integrity of wood structures.
That’s why, in this particular article, we are going to explain how to fix a loose screw in wood with a step-by-step analysis. We will also provide answers to some frequently asked questions.
This guide covers simple, effective techniques to tighten or refasten loose screws in wood.

Common Causes of Loose Wood Screws
Before jumping into fixes, understanding potential reasons behind loosening helps address underlying issues:
Inadequate Installation
Failure to pre-drill pilot holes or only partially driving in screws significantly increases the risk of loosening. Proper installation techniques, including drilling appropriate pilot holes and fully driving screws into place, are essential to maintaining a secure hold. Pilot holes help guide the screws and reduce the chances of wood splitting, ensuring a tighter fit.
Insufficient Screw Length
Using screws that are too short for the application can lead to inadequate grip on the wood, making them more likely to detach under strain. Ensuring that screws are long enough to penetrate deeply into the wood and engage sufficient threads is crucial. Correct screw length provides better holding power and reduces the likelihood of loosening over time.
Weak Supporting Material
Materials like particle board and MDF are more prone to crumbling and losing their grip on screws compared to natural wood. Over time, screws can become loose as these materials degrade around the fastener. Reinforcing weak materials with additional support, such as metal brackets or using screws designed for low-density materials, can help maintain screw integrity.
Vibration and Movement
Constant vibrations from hanging objects, machinery, or frequently opened and closed doors can slowly loosen screws in wood over time. This is particularly common in environments subject to regular movement or shaking. To combat this, consider using screws with locking mechanisms, applying thread-locking compounds, or incorporating vibration-dampening materials to maintain a secure fit.
Stripping and Damage
Over-torquing screws during installation can strip the screw heads or damage the wood fibers, impairing the holding power of the screws. Stripped screws cannot be tightened effectively, leading to loose connections. To avoid this, use torque-limiting drivers and apply moderate, consistent pressure when driving screws to prevent stripping and ensure a secure hold.
Seasonal Wood Movement
Wood naturally expands and contracts with changes in moisture and temperature, which can gradually loosen screws in certain joints. This is especially prevalent in areas with significant seasonal humidity changes. Allowing for wood movement in joint design and using flexible adhesives or fasteners can help accommodate these changes and reduce the risk of loosening.
Tightening Existing Loose Screws
For screws that are simply loose but still held in place, try tightening first before replacing:
Step 1: Inspect the Joint
Check if loosening is limited to individual screws or if the entire joint has come apart. Assess if screws can be simply tightened or more extensive repairs are needed.
Step 2: Tighten with Screwdriver
Use a properly fitting screwdriver to tighten the loose screws. Apply slow, gradual turning force to avoid damage.
Step 3: Add Reinforcements
Consider adding washers, epoxy or wood glue to increase holding power after tightening.
Step 4: Allow Proper Curing Time
Give adhesives time to fully cure before applying load on the joint to prevent re-loosening.
Re-securing Completely Detached Screws
For missing or fully detached screws, new fastening is required:
Step 1: Remove Old Screw Fragments
Eliminate any remaining screw shaft or threads from the original hole to allow fresh fastening.
Step 2: Determine Best Refastening Method
Assess if simply using a longer screw, filling the hole with wood inserts or redrilling will provide most secure fastening.
Step 3: Fill or Redrill Hole
For stripped holes, consider filling with dowels, toothpicks or wood inserts before redrilling pilot holes.
Step 4: Install New Replacement Screw
Drive in new replacement screw using proper technique to maximize holding strength. Consider larger diameter or screws with specialized threads like pan heads.
Step 5: Check Alignment
Verify joint components are properly realigned before completing fastening.
Filling Oversized Screw Holes
If the original screw hole size has become too large, filling it can allow redrilling for a tighter fit:

Match Filler Material to Screw Hole Size
Choose an appropriately sized filler material that fits tightly into the enlarged hole. Suitable materials include toothpicks, wood plugs, golf tees, chopsticks, or cocktail sticks. The goal is to ensure the filler material fits snugly without significant gaps, providing a solid base for the new screw.
Cut Material to Slightly Oversize Length
Cut the filler material to a length slightly longer than the depth of the hole. This allows you to drive the filler in firmly, ensuring it remains securely in place. The extra length also provides material to work with if any adjustments are needed after insertion.
Insert and Set Filler Snugly
Insert the filler material into the hole, driving it in until it is set flush with the surface. Use pliers or a small hammer if necessary to ensure the filler is tightly packed and firmly in place. The snug fit is crucial for creating a solid foundation for the new screw.
Trim any Excess Material
After setting the filler material, trim off any excess that extends outside the hole. Use a sharp utility knife, chisel, or sandpaper to achieve a flat, smooth surface level with the surrounding material. This ensures a clean finish and prepares the area for redrilling.
Drill New Pilot Hole
Drill a new pilot hole centered in the filled area. The pilot hole should be slightly smaller than the diameter of the replacement screw. This allows the screw to grip the filler material and the surrounding wood effectively, providing a reinforced and secure hold.
Read More: How drill a Straight Through a Post
Using Specialized Screw Types
Many types of screws are available on the market. Consider screws with specialized threads or designs to maximize holding power:
Pan Head Screws
The wide-angled head of pan head screws provides increased load distribution and grip compared to standard screws. This design allows the screw to hold the material more securely, reducing the likelihood of the screw pulling out under pressure.
Washer Head Screws
Washer head screws have a built-in washer flange that provides a greater holding surface area against the wood. This design distributes the force more evenly, which helps to prevent the screw from sinking too deeply into the wood and provides a more secure hold.
Thread Rolling Screws
Thread rolling screws are designed with special threads that enhance grip in the wood, preventing pull-outs and stripping. The unique thread design helps to cut into the wood fibers, creating a stronger bond and increasing the screw’s holding power.
Tapcon Concrete Screws
Tapcon concrete screws are designed for use in particularly dense or damaged wood. These screws provide firmer anchoring due to their ability to tap into the material, making them ideal for applications requiring extra strength and stability.
Preventing Future Loosening
To ensure the longevity and stability of your installations, implement best practices during installation to prevent screws from loosening over time:
Drill Proper Pilot Holes
Drilling proper pilot holes minimizes wood splitting and allows smoother screw setting. The pilot hole should be slightly smaller than the screw’s diameter to ensure a tight fit while reducing stress on the wood.
Read More: Best Cordless drill under $100
Avoid Over Torquing
Using torque-limiting drivers can prevent over-tightening and stripping during installation. Over-torquing can damage both the screw and the material, leading to weaker joints and potential failure.
Consider Screw Length
Choosing the correct screw length is crucial for achieving maximum holding power. Longer screws provide more threaded grip area within the wood, which enhances the screw’s ability to hold the material securely.
Use Washers Where Needed
Using washers can help distribute the force over a greater area, enhancing the holding strength of the screw. Washers are particularly useful in applications where the material is soft or prone to splitting.
Allow Proper Curing Time
When using adhesives in conjunction with screws, it’s important to allow adequate curing time before loading the joints. This ensures that the adhesive has fully set and can provide additional support to the joint.
Diagnosing the Cause of Persistent Loosening
If screws keep working loose despite proper installation and fastening techniques, evaluate potential reasons:
Assess Supporting Material Strength
Very soft woods, MDF (medium-density fiberboard), and particle boards offer low screw holding strength. These materials can be prone to screw loosening due to their inability to maintain a firm grip on the screw threads. Consider reinforcing these materials with additional supports or using specialized screws designed for low-density materials to improve holding power.
Check for Excessive Wood Movement
Wood is a natural material that expands and contracts with changes in humidity and temperature. Excessive seasonal expansion and contraction of wood members can cause joints to loosen over time. Ensure that your joint design allows for this natural movement to prevent stress on the screws. Using flexible adhesives or mechanical fasteners that can accommodate slight movements can also help.
Consider Vibration Levels
Objects that are subject to constant shaking or vibration from use or external sources are more likely to experience screw loosening over time. This is common in machinery, furniture, or structures near heavy traffic or industrial activity. To mitigate this, consider using vibration-dampening materials or techniques, such as rubber washers or lock washers, to absorb some of the movement and maintain screw tightness.
Test Load Levels on Joint
Higher loads than the wood joint capacity can gradually pull fasteners loose. If the load on the joint exceeds what the wood and screws can handle, it can lead to loosening. Evaluate the load levels on your joints and, if necessary, redistribute the load more evenly or use stronger fasteners. Reinforcing the joint with additional supports or using metal brackets can also help distribute the load more effectively.
Look for Structural Damage or Wear
Persistent loosening can sometimes indicate underlying structural damage or wear in the components. Check for signs of damage, such as cracks, splits, or worn-out screw holes, that may be compromising the integrity of the joint. Repair or replace damaged components to ensure a secure hold. Filling stripped screw holes with wood filler or using larger diameter screws can restore the holding power in worn areas.
Troubleshooting Common Loose Screw Problems
Problem: Tightened screw quickly comes loose again
Cause: Insufficient grip in supporting material
Solution: Use a longer screw, change the screw type, or fill the hole for tighter threads.
Problem: Head strips during tightening
Cause: Low screw quality or damaged head
Solution: Use vice grips to remove the remainder, clean the threads, and install a new replacement screw.
Problem: Tightened joint still wobbles
Cause: Screw loosening due to wood movement
Solution: Allow expansion space, use slotted holes, or add washers.
Problem: Pilot drill keeps wandering
Cause: Inadequate drilling setup
Solution: Use a drilling jig or apply a painter’s tape guide to prevent wandering.
FAQs About Fixing Loose Screws in Wood
Can you reuse a screw hole in wood?
Yes, screw holes in wood can be reused by filling the hole with a suitable wooden plug, then redrilling a pilot hole for a fresh screw. Match the plug size to the hole diameter for a tight fit.
Should loose wood screws be replaced?
Not necessarily. If screws are simply loose but undamaged, try tightening them first with a screwdriver to re-secure them. However, replace any badly worn, bent, or broken screws.
How do you stop a screw from loosening in wood?
Proper pilot holes, avoiding overtightening, using washers, and allowing adhesives to cure can help stop wood screws from loosening. For stubborn cases, consider using specialized thread or head designs to enhance grip.
Can you use longer screws in existing holes?
Yes, installing new longer screws into existing holes in wood can provide extra grip and security against loosening. Just predrill slightly deeper pilot holes to accommodate the increased length.
Final Thoughts
Dealing with loose screws in wood projects or furniture can be frustrating. However, in most cases, the solutions are quick, easy, and inexpensive using common items like toothpicks, glue, and simple tools.
Following basic guidelines for proper screw selection, installation, and joint design goes a long way toward preventing loose screws in your woodworking. When problems do occur, this guide covers multiple proven methods to re-tighten and re-secure loose screws to restore full strength and function to your wood structures.
Lastly, See the Video Tutorial-


