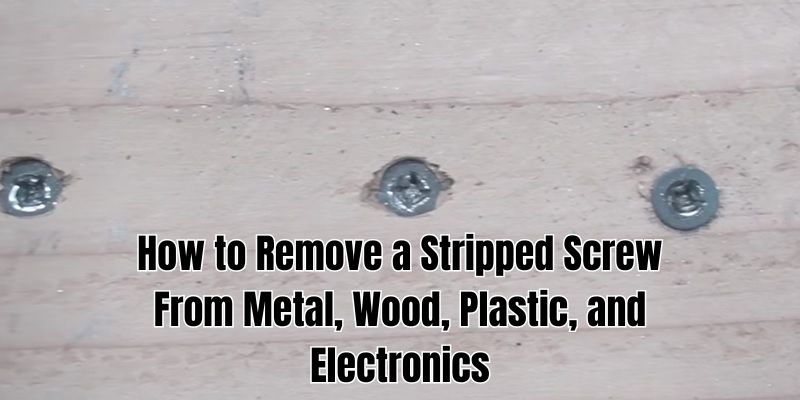
A stripped screw is a frustrating problem that can suddenly stop any DIY project or repair. It happens when the head of a screw becomes damaged, making it difficult or impossible to remove using standard methods. Stripping can happen due to using the wrong size bit, working with worn-out bits, applying the wrong technique, or not providing enough pressure and support. Knowing how to remove a stripped screw is an essential skill for any handyman or DIY enthusiast. In this comprehensive guide, we’ll explore various proven methods to remove stripped screws from metal, wood, plastic, and small electronics screws.
Common Reasons for Stripping Screws
Using the wrong size bit: Using a bit that is too small or too large for the screw head can cause stripping.
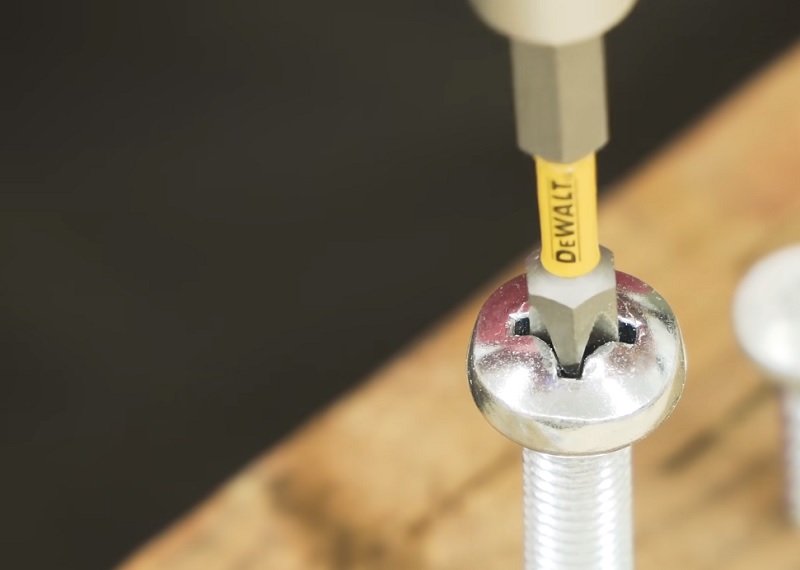
Working with worn-out bits: Over time, bits can become worn, reducing their ability to grip the screw head properly.
Using the wrong length of bit: If the bit is too short, it may not fully engage with the screw head, leading to stripping.
Applying incorrect form and technique: Improper alignment or angling of the screwdriver can cause the bit to slip and strip the screw.
Providing not enough pressure and support: Failing to apply enough downward pressure or support can cause the bit to cam out and strip the screw.
Tools and Materials Needed to Removing Stripped Screws
Before diving into the various techniques on how to remove a stripped screw, it’s essential to gather the necessary tools and materials. These may include:
- Screwdrivers: A variety of flathead and Phillips screwdrivers in different sizes.
- Cordless Drill Driver: A power drill with adjustable torque settings.
- Screw Extractor Set: Specialized bits designed to grip and remove stripped screws.
- Rubber Bands: Thick rubber bands provide extra grip.
- Assorted Tapes: Duct tape, electrical tape, masking tape, and Teflon tape can offer additional grip.
- Steel Wool: Fine steel wool can create friction between the driver and the screw head.
- Super Glue: Can bond the driver bit to the screw head.
- Rotary Tool: A Dremel or similar tool with cutting and grinding attachments.
- Pliers and Vice Grips: For grasping and turning the screw head.
- Hammer and Chisel: For gently tapping around the screw head.
- Safety Gear: Always wear safety goggles and a dust mask.
How to Remove a Stripped Screw: 17 Methods
Now that you have a solid understanding of stripped screws and the necessary tools, let’s explore the most effective techniques for removing them. We’ll start with the simplest methods and progress to more advanced techniques for tackling stubborn cases. In this section on how to remove a stripped screw, we’ll cover everything from the rubber band technique to the welding method.
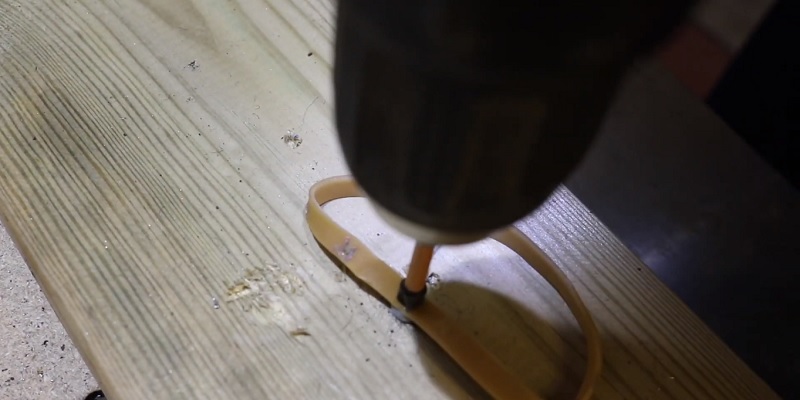
#1 Rubber Band Technique
The rubber band method is a quick and easy way to remove a stripped screw, especially if the damage to the head is minimal.
Steps:
- Place a wide rubber band over the stripped screw head, covering it completely.
- Firmly press your cordless drill driver or screwdriver onto the rubber band and the screw head.
- Apply steady pressure and slowly turn the driver counterclockwise to loosen the screw.
- Continue turning until the screw is fully removed.
This technique works best for mildly stripped screws, including those in mobile phones, and can be attempted before moving on to more advanced methods.
#2 Duct Tape Method
Duct tape can provide extra grip when dealing with stripped screws.
Steps:
- Place a piece of duct tape over the stripped screw head, ensuring it covers the entire surface.
- Press your cordless drill driver or screwdriver with force onto the tape and the screw head.
- Apply steady pressure and slowly turn the driver counterclockwise to loosen the screw.
- Continue turning until the screw is removed.
#3 Electrical Tape Method
Electrical tape is another option for removing stripped screws. Follow the same steps as the duct tape method, but use electrical tape instead. The adhesive properties of electrical tape can help the driver bit grip the screw head more securely.
#4 Masking Tape Method
Masking tape is another option for providing extra grip when removing stripped screws.
- Place a piece of masking tape over the screw head, ensuring it covers the entire surface.
- Use the cordless drill driver or screw driver to press with pressure onto the tape and the screw head.
- Apply steady pressure and turn the driver counterclockwise to loosen and remove the screw.
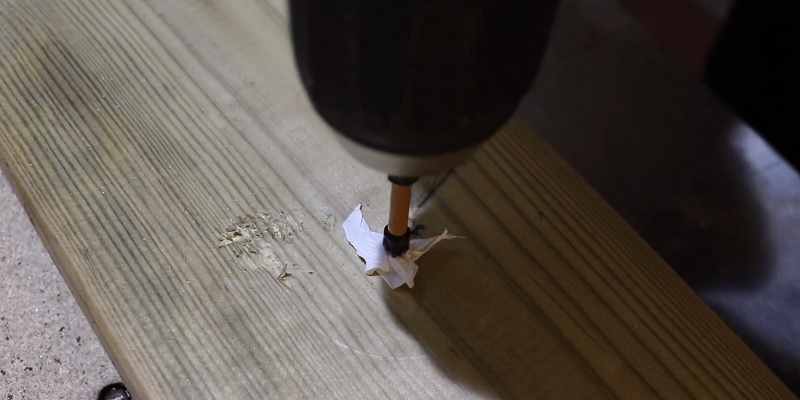
#5 Teflon Tape Method
Teflon tape, also known as plumber’s tape, can help create friction between the drill driver and the stripped screw head.
Steps:
- Wrap a piece of Teflon tape around the stripped screw head, covering it completely.
- Press your cordless drill driver or screwdriver securely onto the Teflon tape and the screw head.
- Apply steady pressure and slowly turn the driver counterclockwise to loosen the screw.
- Continue turning until the screw is removed.
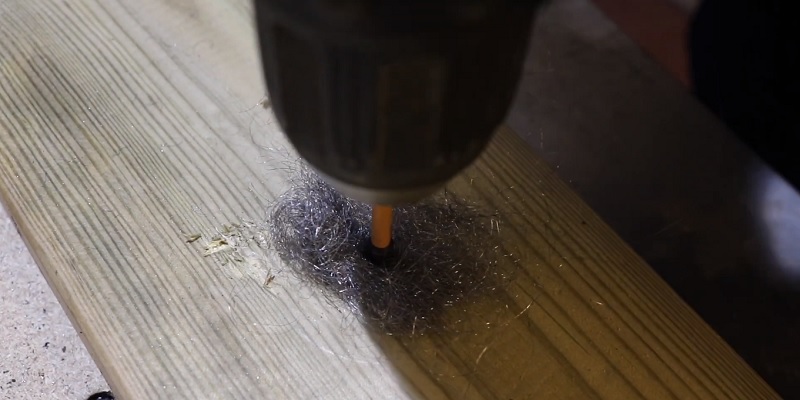
#6 Steel Wool Method
Steel wool can provide extra grip and friction when removing stripped screws.
Steps:
- Place a small piece of steel wool over the stripped screw head.
- Press the cordless drill driver or screw driver tightly onto the steel wool and the screw head.
- Apply steady pressure and slowly turn the driver counterclockwise to loosen and remove the screw.
All these 6 methods are very effective DIY methods to remove a stripped screw that you can try with items around your home. There’s no need to buy anything new or become an expert. A screwdriver set or regular cordless drill, which most homeowners own, and rubber or other types of tape are all you need. If the above tricks don’t work, then you should try the advanced methods.
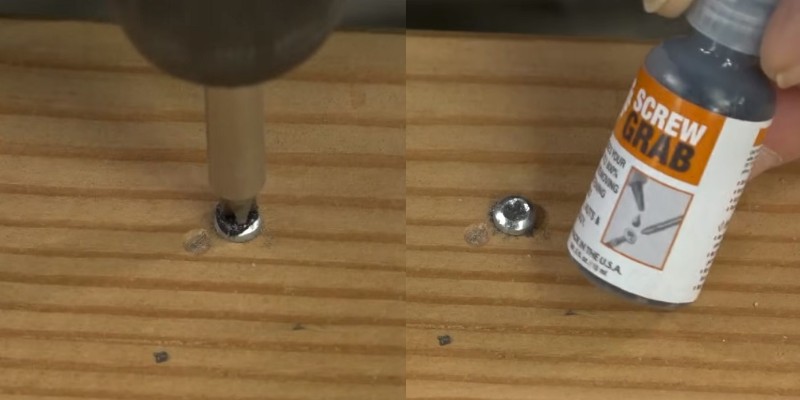
#7 Screw Grab Trick
The screw grab trick can be surprisingly effective for extracting stripped screws, thanks to the friction-enhancing crystals suspended in the fluid.
Steps:
- Clean the screw head and the surrounding area to remove any debris, dust, or oil that may hinder adhesion.
- Apply a small amount of the screw grab fluid directly onto the screw head, ensuring even coverage without excess.
- Insert the appropriate screwdriver bit into the screw head, making sure it’s well-centered.
- Apply steady downward pressure on the screwdriver while slowly turning it counterclockwise to remove the screw.
The friction-enhancing crystals in the fluid increase the grip between the screwdriver and the stripped screw, making extraction much easier.
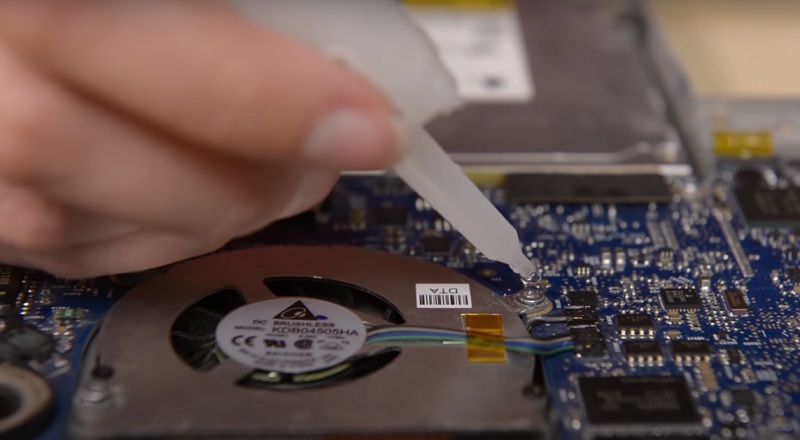
#8 Super Glue Trick (for small screws)
For small stripped screws, like those found in electronics, the super glue trick can be a lifesaver.
Steps:
- Clean the screw head and the surrounding area to remove any debris, dust, or oil that may hinder adhesion.
- Apply a small drop of super glue directly onto the screw head, being careful not to let it spread to the surrounding surface.
- Insert the appropriate screwdriver bit (a Torx driver often works well for small screws) into the glue, ensuring it’s centered on the screw head.
- Allow the glue to set completely according to the manufacturer’s instructions, usually a few minutes.
- Once the glue is dry, firmly grip the screwdriver and turn it counterclockwise to remove the screw.
The super glue creates a strong bond between the screwdriver bit and the stripped screw, providing the necessary grip to extract it.
#9 Soldering Method (for Small Screws)
The soldering method is a practical solution for small stripped screws, like those found in mobile phones or laptops. By soldering a new screw onto the stripped one, you can create a strong bond for easy removal.
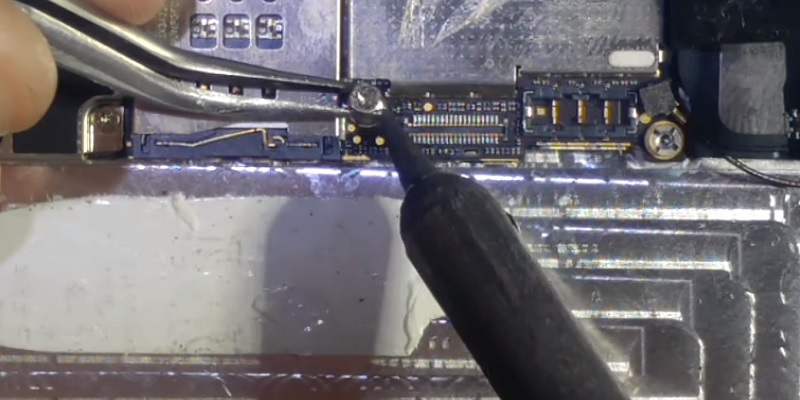
Steps:
- Clean the screw head and surrounding area to remove any debris or oil.
- Heat the stripped screw head using a soldering iron until it’s hot enough for solder to adhere.
- Apply solder to the heated screw head to create a small, melted pool.
- Quickly place a prepared support screw (one with a similar head size) into the melted solder, ensuring it’s centered and makes a solid connection with the stripped screw.
- Hold the support screw in place until the solder cools and solidifies, creating a strong bond.
- Once the connection is secure, use a suitable screwdriver to turn the new support screw counterclockwise and remove the stripped screw.
Caution:
Soldering can be dangerous, especially if you have unsteady hands. Be extremely careful to avoid burns and ensure a strong connection. If needed, seek assistance from someone with experience in soldering.
By using the soldering method, you can effectively remove small stripped screws with precision and care.
#10 Screw Extractor Tool
When dealing with severely stripped screws or those that are deeply stuck in, a screw extractor can be your best friend. These specialized tools are designed to bite into the screw head and remove it with reverse threading.
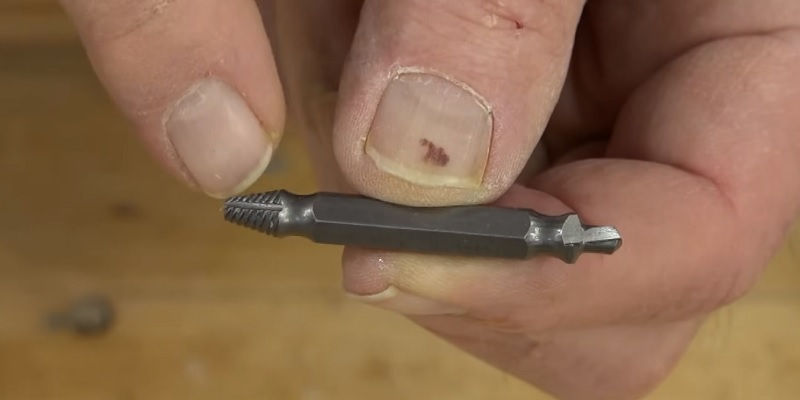
Steps:
- Select a screw extractor that matches the size of the stripped screw. If needed, use a drill to create a small pilot hole in the center of the screw head to accommodate the extractor.
- Insert the screw extractor into the pilot hole or directly into the stripped screw head, ensuring a snug fit.
- Apply firm pressure and turn the extractor counterclockwise using your cordless drill driver or a tap wrench.
- Continue turning until the screw is fully extracted.
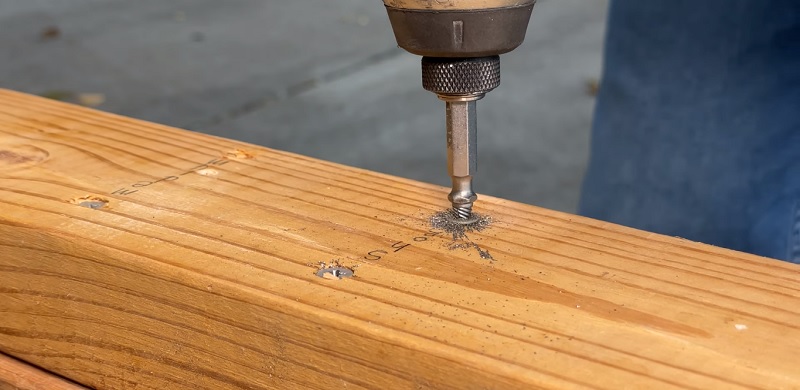
Screw extractors come in various sizes and shapes to accommodate different screw types and diameters. It’s essential to choose the right size extractor to prevent further damage to the screw or the surrounding material.
#11 Flathead Screwdriver and Hammer Method
If enough of the screw head is exposed, you can use a flathead screwdriver and a hammer to create a new slot and remove the screw.
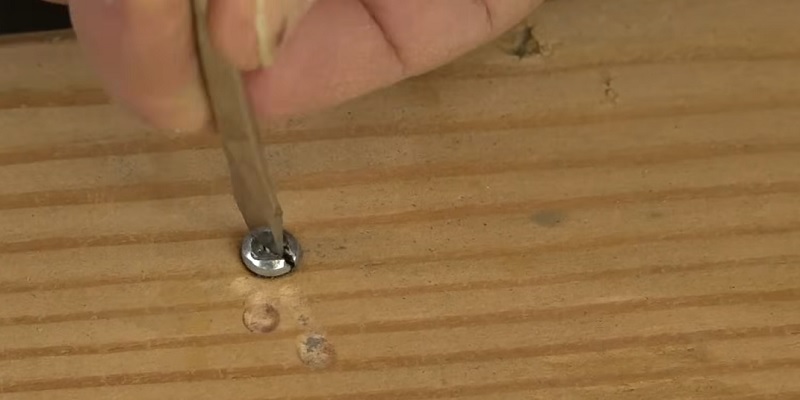
Steps:
- Position the flathead screwdriver on the screw head at an angle.
- Tap the screwdriver with a hammer to dig into the screw head and create a new slot.
- Once a new slot is created, use the flathead screwdriver to turn the screw counterclockwise and remove it.
#12 Dremel or Angle Grinder Method
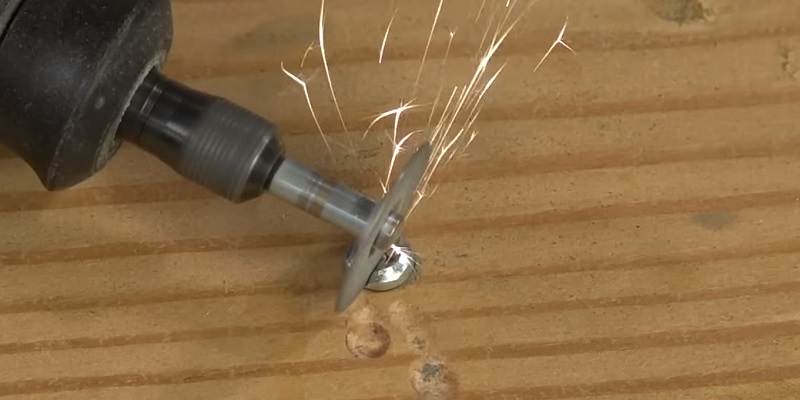
For severely damaged screw heads or those that are flush with the surface, a rotary tool like a Dremel or an angle grinder can be used to create a new slot for removal.
Steps:
- Equip your rotary tool with a cutting disc attachment suitable for the material you’re working with (e.g., metal, wood, or plastic).
- Carefully cut a new slot across the screw head, applying gentle pressure and maintaining a steady hand. The slot should be deep enough to accommodate a flathead screwdriver.
- Once the new slot is created, insert a flathead screwdriver and turn it counterclockwise to remove the screw.
- If the screw remains stubborn, use a hammer and a cold chisel to gently tap around the screw head, loosening it before attempting removal again.
This method should be used cautiously, as it can cause damage to the surrounding surface if not executed precisely. This method is also suitable for small screws like those in laptops. Always wear safety goggles and a dust mask when using rotary tools or angle grinders.
#13 Vice Grips or Pliers
When enough of the screw head is exposed, vice grips or pliers can be used to grip and turn the screw. Firmly grasp the screw head with the vice grips or pliers, ensuring a secure hold. Apply steady pressure and turn the screw counterclockwise to loosen and remove it. This method works best when a significant portion of the screw head is accessible and the screw is not too tight.
#14 Impact Driver Technique
An impact driver is a powerful tool that can be highly effective in removing stubborn or stripped screws, especially those in wood or metal surfaces.
Steps:
- Choose the appropriate driver bit for your impact driver, ensuring it fits securely into the screw head.
- Set the impact driver to the reverse (counterclockwise) direction.
- Place the driver bit firmly into the screw head, applying steady pressure to maintain contact.
- Activate the impact driver by pulling the trigger, allowing the rapid, high-torque impacts to loosen the screw.
- Continue applying pressure and operating the impact driver until the screw is successfully removed.
Impact drivers deliver sudden, intense force to the screw, which can help break it free from the material it’s lodged in. However, exercise caution when using an impact driver on delicate materials or surfaces to avoid causing damage.
#15 Left-Handed Drill Bits
Left-handed drill bits are specially designed for removing stripped screws. These bits are meant to be used in reverse and have a counterclockwise threading. To use a left-handed drill bit, install it in your cordless drill driver and set the driver to rotate in reverse. Carefully drill into the stripped screw head, applying steady pressure. As you drill, the bit will bite into the screw head and begin to remove the screw. Continue drilling until the screw is fully removed.
#16 Centre Punch and Hammer Method
In confined spaces where using a drill or extractor is not feasible, a spring-loaded center punch and hammer can be used to remove a stripped screw.
Steps:
- Place the tip of the center punch on the edge of the screw head.
- Hold the punch firmly and pull back on the spring-loaded mechanism.
- Release the mechanism, allowing the spring’s force to impact the screw head and loosen it.
- Repeat this process until the screw is loose enough to be removed with fingers or pliers.
This method requires a steady hand and careful aim to avoid damaging the surrounding surface.
#17 Welding Method
This is the last method and is for metal surfaces. If screws in metal surfaces are stripped, welding a nut or a bolt to the screw head can provide a strong grip for removal.
Steps:
- Clean the area around the stripped screw to remove any debris or oil.
- Weld a nut or a bolt onto the screw head, ensuring a secure connection.
- Allow the weld to cool down completely.
- Use a wrench or a socket to turn the welded nut or bolt counterclockwise, removing the screw.
Read More: How to Unscrew Stripped Bolt?
How to Remove Stripped Screws from Different Materials
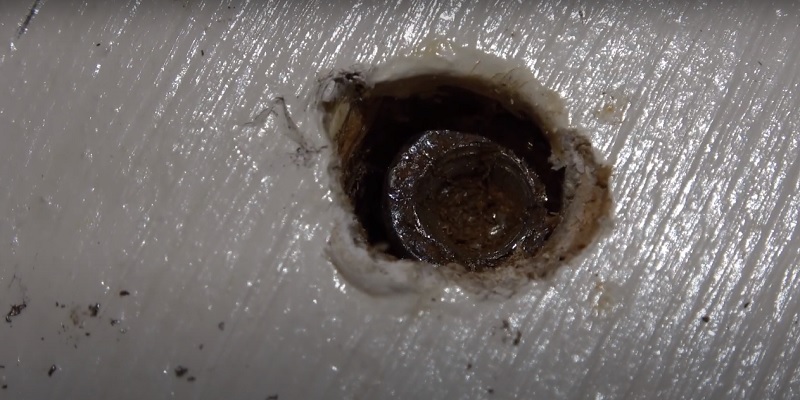
The method for removing a stripped screw may vary depending on the material it is stuck in. For wood, using a screw extractor, drilling a pilot hole, or using a larger screw can be effective.
When dealing with metal, apply penetrating oil to lubricate the screw and use left-handed drill bits or screw extractors. For plastic, heating the screw with a soldering iron can help soften the surrounding material, making removal easier. Plastic-specific screw extractors are also available.
How to Remove Small and Recessed Stripped Screws
Small and recessed stripped screws are particularly tricky to remove, especially in electronics and other delicate items where accuracy is crucial. Using a precision screwdriver set with a rubber band can provide better control and grip. If the screw head is badly damaged, you might need to create a new slot using a rotary tool.
For extra grip, apply a small amount of super glue to the driver bit, letting it stick to the screw head before removal. For experts, the soldering method can also be used. These methods have been effective in our experience.
Preventing Stripped Screws
While knowing how to remove stripped screws is essential, preventing them from happening in the first place is even better. Here are some best practices to help minimize the risk of stripping screws:
Use the Correct Screwdriver Size and Type
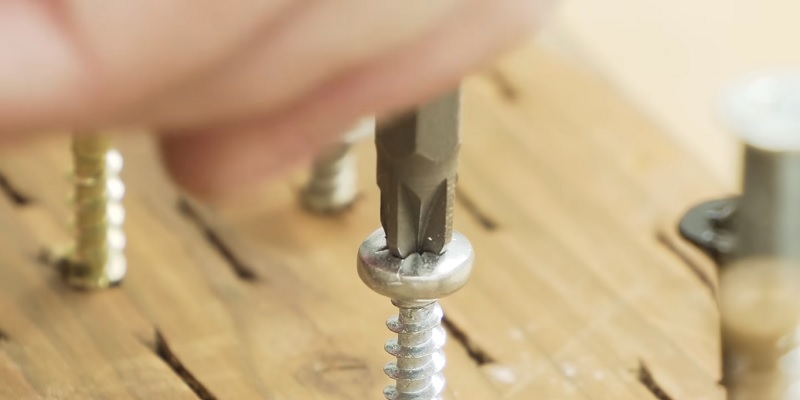
Always match the screwdriver or drill driver bit to the screw head size and type to ensure a proper fit and reduce the likelihood of slippage.
Apply Controlled Pressure
When driving screws, apply steady, controlled pressure to maintain engagement between the driver and the screw head. Avoid excessive force that can lead to stripping.
Invest in Quality Tools
High-quality drill drivers, bits, and screws made from durable materials are less likely to cause stripping and will last longer.
Pre-Drill Pilot Holes
When working with harder materials like metal or dense wood, pre-drilling pilot holes can help guide the screw and reduce the risk of stripping. Ensure the pilot hole is slightly smaller than the screw’s diameter for the best results.
Use a Manual Screwdriver for Delicate Tasks
When dealing with small screws or delicate materials, opt for a manual screwdriver instead of a power tool to maintain better control and prevent over-tightening.
Lubricate Threads
Applying a small amount of lubricant, such as beeswax or machine oil, to the screw threads can help reduce friction and minimize the risk of stripping during installation.
Regular Bit Inspection and Replacement
Ensure that your screwdriver and drill bits are in good condition. Worn or damaged bits are more likely to slip and strip screws. Replace bits when they show signs of wear.
Use the Correct Screw Head
Identify and use the correct type of screw head (e.g., Phillips, Torx, Pozidriv) to ensure a proper fit with the driver bit.
Wear Safety Gear
Always wear safety glasses and gloves when working with screws to protect yourself from flying debris and sharp edges.
Use Impact Drivers Appropriately
When using an impact driver, be cautious with delicate materials as these tools can apply excessive torque quickly.
Recognize Early Signs of Stripping
If you notice the driver slipping, stop immediately and reassess your bit size and alignment to prevent further damage.
By adopting these best practices and using the appropriate techniques and tools for removing stripped screws, you’ll be well-equipped to handle any challenging situation that comes your way.
When to Seek Professional Help
While most stripped screw situations can be resolved with the right tools and techniques, there are times when seeking professional help is the best course of action. If you are dealing with rusted screw or delicate materials, it may be wise to consult a professional to avoid causing further damage.
Stripped screws in hard-to-reach places may also require specialized tools and expertise. If you feel unsure or uncomfortable attempting the removal yourself, don’t hesitate to seek the assistance of a qualified technician.
Final Thoughts
Removing stripped screws can be a challenging task, but with the right knowledge, tools, and techniques, it becomes much more manageable. This comprehensive guide has provided you with an overview of various methods for removing stripped screws, including the rubber band technique, tape methods, steel wool, super glue trick, screw extractor tools, and more. Remember to assess the situation, gather the necessary tools, and prioritize safety before attempting any removal method.
Having the right tools and techniques at your disposal can make a significant difference in the success of your stripped screw removal efforts. Don’t be discouraged if one method doesn’t work; simply move on to the next until you find the solution that works best for your specific situation. With practice and persistence, you’ll develop the skills and confidence to tackle any stripped screw challenge that comes your way.
If you find yourself in a situation where you feel unsure or the stakes are too high, don’t hesitate to seek professional help. It’s better to rely on the expertise of a qualified technician than to risk causing further damage to your valuable components or materials.
Remember, the key to success is patience, the right tools, and a willingness to try different techniques. By following the tips and tricks outlined in this guide and utilizing a cordless drill driver when appropriate, you’ll be well-equipped how to remove stripped screws like a pro. Happy fixing!


