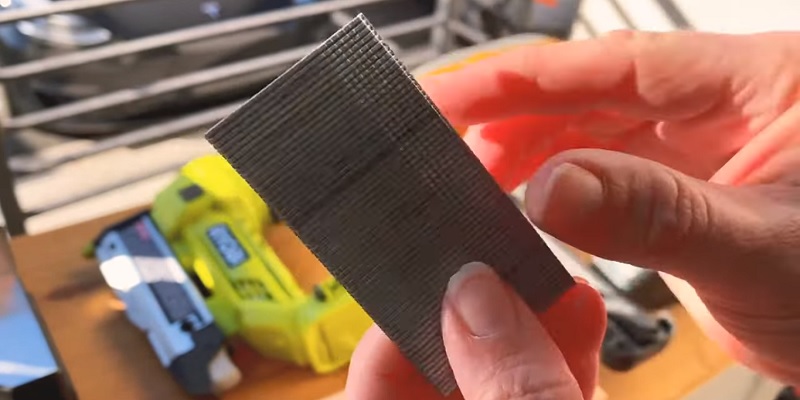
Brad nails are a popular choice among DIY enthusiasts, home improvement hobbyists, and professional carpenters alike. These thin, gauge nails are designed for a variety of light carpentry tasks, offering a strong hold without splitting or damaging the wood.
In this comprehensive guide, we’ll explore what brad nails are used for, the different types and sizes available, and how to choose the right brad nails for your specific projects, such as attaching quarter round or shoe molding.

What Are Brad Nails Used For?
Brad nails are most commonly used for trim work, molding, and other light carpentry applications. Their thin design allows them to penetrate wood without causing noticeable holes or splitting, making them ideal for attaching delicate pieces like baseboards, chair rails, picture frames, and cabinet backing. Brad nails provide a strong hold while minimizing the need for wood filler or extensive touch-ups, resulting in a clean, professional finish.
In addition to trim work, brad nails are often used in furniture building and cabinetry. They are perfect for securing thin pieces of wood or attaching decorative elements like overlays and veneers. Brad nails can also be used for temporary holding tasks, such as securing pieces together while glue dries or while making measurements and adjustments.
Types of Brad Nails
Brad nails come in various materials, each with its own advantages and disadvantages. The most common types of brad nails are:
1. Steel Brad Nails
These are the most affordable and widely used brad nails. They are suitable for general-purpose applications and provide a strong hold. However, steel brad nails are prone to rusting over time, which can cause discoloration in the wood.
2. Galvanized Brad Nails
Galvanized brad nails are coated with a layer of zinc, which helps protect against rust and corrosion. They are an excellent choice for projects that may be exposed to moisture or humidity, such as outdoor furniture or bathroom cabinets.
3. Stainless Steel Brad Nails
These nails are made from a corrosion-resistant alloy, making them ideal for use in damp or wet environments. Stainless steel brad nails are more expensive than other types but offer superior durability and resistance to rust.
To material differences, brad nails can also be coated or uncoated. Coated brad nails have a thin layer of adhesive or resin that helps improve their holding power and reduces the risk of the nail backing out over time. Uncoated brad nails are more affordable but may not have the same level of holding power as their coated counterparts.
Brad Nail Sizes
Brad nails come in various sizes, typically ranging from 3/8 inch to 2 inches in length, with gauges ranging from 18 to 23. The most common brad nail sizes are:
- 3/8 inch (18 gauge): These short brad nails are ideal for attaching thin trim pieces or small decorative elements.
- 5/8 inch (18 gauge): This size is suitable for light trim work, such as attaching quarter round or shoe molding.
- 1 inch (18 gauge): One-inch brad nails are versatile and can be used for a variety of trim applications, including baseboards and chair rails.
- 1-1/4 inch (18 gauge): These longer brad nails are perfect for thicker trim pieces or for securing multiple layers of wood.
- 1-1/2 inch (18 gauge): Use these brad nails for heavier trim work or for attaching thicker baseboards.
- 2 inch (18 gauge): These are the longest brad nails available and are used for heavy-duty trim applications or for securing thick pieces of wood.
When choosing the right size brad nail for your project, consider the thickness of the materials you’re working with and the desired holding power. Longer nails provide a stronger hold but may be more likely to split thin pieces of wood. Shorter nails are less noticeable but may not provide enough holding power for heavier applications.
Brad Nail Sizes Chart
To help you choose the right brad nail size for your project, refer to this helpful chart:
| Length | Gauge | Typical Applications |
| 3/8″ | 18 | Thin trim, small decorative elements |
| 5/8″ | 18 | Light trim, quarter round, shoe molding |
| 1″ | 18 | General trim work, baseboards, chair rails |
| 1-1/4″ | 18 | Thicker trim, multiple layers of wood |
| 1-1/2″ | 18 | Heavier trim, thick baseboards |
| 2″ | 18 | Heavy-duty trim, thick wood pieces |
What Size Nails for Quarter Round?
When installing quarter round molding, it’s essential to choose the right size brad nails to ensure a secure hold without splitting the wood. For most quarter round applications, 5/8-inch, 18-gauge brad nails are recommended. These nails are long enough to penetrate the quarter round and the underlying surface, providing a strong hold while minimizing the risk of splitting.
To install quarter round using brad nails, follow these tips:
- Use a brad nailer for consistent and precise nail placement.
- Position the brad nailer at a slight angle to drive the nail through the quarter round and into the base surface.
- Space the brad nails evenly along the length of the quarter round, typically every 8 to 12 inches.
- Fill any visible nail holes with wood filler, sand, and finish as desired.
What Size Nails for Shoe Molding?
Shoe molding, also known as base shoe, is a thin strip of molding used to cover the gap between the baseboard and the floor. Like quarter round, shoe molding requires careful nail selection to prevent splitting and ensure a tight fit. For most shoe molding installations, 5/8-inch, 18-gauge brad nails are the ideal choice.
To install shoe molding using brad nails, follow these tips:
- Begin by cutting the shoe molding to the desired length, ensuring tight fits at corners and joints.
- Use a brad nailer to attach the shoe molding to the baseboard, positioning the nailer at a slight angle.
- Space the brad nails every 8 to 12 inches along the length of the shoe molding.
- Fill any visible nail holes with wood filler, sand, and finish to match the molding.
How to Use Brad Nails

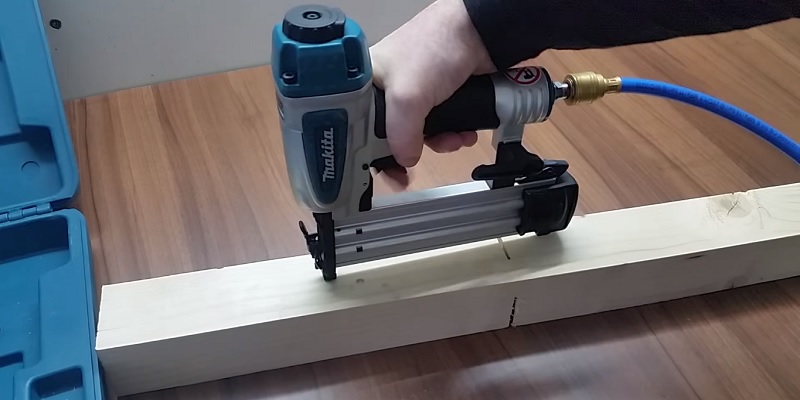
Using brad nails is relatively simple, but it does require the use of a brad nailer. This power tool uses compressed air or electricity to drive brad nails into wood quickly and accurately. To use a brad nailer, follow these steps:
- Load the brad nails into the nailer’s magazine, ensuring they are the correct size for your project.
- Connect the nailer to an air compressor or power source, depending on the model.
- Adjust the nailer’s depth setting to ensure the nails are driven to the proper depth for your material.
- Position the nailer against the workpiece, aligning the tip with the desired nail location.
- Squeeze the trigger to fire the brad nail into the wood.
- Continue nailing along the workpiece, maintaining consistent spacing and depth.
When using a brad nailer, always wear safety glasses to protect your eyes from flying debris. Keep your hands and fingers away from the nailer’s tip to prevent accidental injuries. If a nail jams in the nailer, disconnect the power source before attempting to remove the jammed nail.
FAQs:
Can brad nails be used for structural projects?
No, brad nails are not suitable for structural applications or load-bearing projects. They are designed for light carpentry tasks and decorative purposes only. For structural projects, use larger, stronger fasteners like framing nails or screws.
How to remove brad nails without damaging the wood?
To remove brad nails without damaging the wood, use a pair of end nippers or a small pry bar. Grasp the head of the nail with the nippers or position the pry bar under the nail head, then gently pull the nail out. If the nail is flush with the wood surface, use a nail punch to drive it slightly below the surface before removing it.
How should I maintain and store brad nails?
To maintain the quality and performance of your brad nails, store them in a dry, cool place away from moisture and humidity. Keep them organized in a container or storage box to prevent rust and corrosion. Discard any bent, damaged, or rusted nails to avoid jams or misfires in your brad nailer.
Final Thoughts
Brad nails are an essential fastener for a wide range of light carpentry tasks, from trim work and molding to furniture building and cabinetry. By understanding the different types, sizes, and applications of brad nails, you can choose the right nails for your projects and achieve professional-looking results.
Always prioritize safety when using a brad nailer, and take the time to select the appropriate nail size for your specific materials and applications. With the information provided in this guide, you’ll be well-equipped to tackle your next project using brad nails with confidence.
By following this comprehensive guide, you’ll have a thorough understanding of what brad nails are used for, the different types and sizes available, and how to choose and use them effectively in your projects. Whether you’re a DIY enthusiast or a professional carpenter, brad nails are a versatile and essential fastener to keep in your toolbox.


