Finishing a tile project feels great until you notice dried grout stuck on your beautiful tiles. This common problem happens to both DIY homeowners and professionals alike. Dried grout can make your new tile look dirty and unfinished, but don’t worry – you can fix this problem.
In this guide, I’ll share what I’ve learned from years of working with tile. I’ll show you simple ways to remove dried grout from different types of tiles without causing damage. Whether you’re dealing with ceramic, porcelain, stone, or textured tiles, you’ll find practical solutions here.
Let’s start by understanding why dried grout is so tricky to remove, then move on to the best removal methods for each situation.
Why Dried Grout Is Hard to Remove
Grout is made to be strong and long-lasting. That’s why it becomes so difficult to remove once it dries. Here’s what happens:
Grout contains cement that hardens through a chemical process called curing. Fresh grout can be wiped away easily within the first 20-30 minutes. After a few hours, grout begins to set firmly. Within 24-48 hours, grout becomes very hard and bonds strongly to surfaces. Fully cured grout (after 7-10 days) is extremely difficult to remove.
The longer grout sits on your tile, the harder it becomes to remove. That’s why timing is important when cleaning up after grouting.
Different tile types also affect how easily grout can be removed. Smooth tiles like polished ceramic are easier to clean than rough stone or textured tiles where grout can hide in small crevices.
Assessing Your Grout Problem
Before choosing a removal method, take some time to look at your specific situation:
How long has the grout been dry? Recently dried grout (1-2 days) is easier to remove than grout that’s been curing for weeks.
What type of tile do you have? Check if you have ceramic (typically has a white or colored clay body), porcelain (denser than ceramic, usually has the same color throughout), natural stone (marble, granite, travertine, slate), glass tiles, or textured or uneven surface tiles.
What type of grout was used? Traditional cement grout is easier to remove than epoxy grout.
How much grout needs to be removed? Is it just a light haze or thick chunks?
Once you’ve answered these questions, you can pick the right tools and methods.
Tools and Supplies You’ll Need
Having the right tools makes grout removal much easier. Here’s what you might need:
Basic Tools
Plastic scraper or old credit card, nylon scrub pad (non-scratch), microfiber cloths, soft bristle brush or toothbrush, wooden craft stick, grout removal tool (hand tool with a carbide tip), sponge, spray bottle, bucket, and clean water.
Cleaning Solutions
White vinegar, lemon juice, commercial grout haze remover (appropriate for your tile type), baking soda, sugar and water solution (for fresh grout only), and mild dish soap.
Protective Gear
Rubber gloves, eye protection, knee pads (for floor work), and mask (when using chemical cleaners).
General Removal Techniques
Let’s start with methods that work for most tile types, then get into specific solutions for different tiles.
Method 1: Water and Elbow Grease
For fresh grout haze (less than 24 hours old):
Wet a clean sponge with warm water. Wring it out until it’s just damp. Wipe the tile surface using circular motions. Rinse the sponge often and change the water when it gets cloudy. Dry the tile with a clean microfiber cloth.
This simple method works best for very recent grout haze that hasn’t fully hardened.
Method 2: Vinegar Solution (for ceramic and porcelain only)
Mix equal parts white vinegar and warm water in a spray bottle. Spray a small test area first to make sure it doesn’t damage your tile. Apply to a section of dried grout. Let it sit for 5-10 minutes (don’t let it dry). Scrub with a nylon pad using small circular motions. Wipe clean with a damp cloth. Rinse thoroughly with clean water.
Important: Never use vinegar on natural stone tiles like marble, limestone, travertine, or onyx. The acid will etch and damage the stone.
Method 3: Commercial Grout Haze Remover
Buy a grout haze remover made for your specific tile type. Test on a small, hidden area first. Follow the package directions exactly. Work in small sections. Rinse thoroughly after cleaning.
Commercial removers come in acid-based and non-acid formulas. Only use acid-based removers on ceramic and porcelain tiles, never on natural stone.
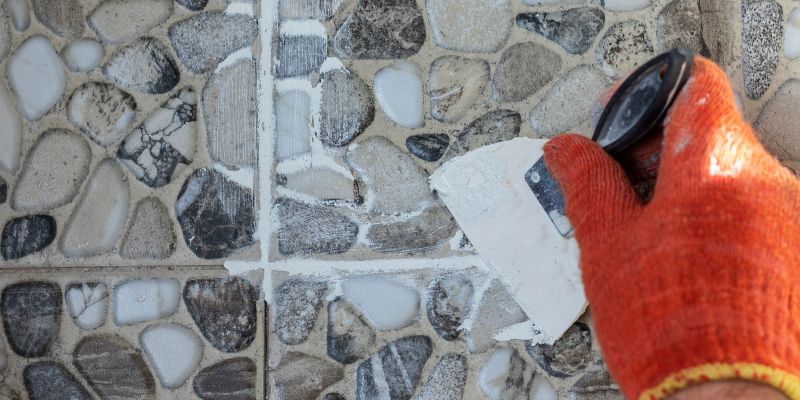
Method 4: Softening and Scraping
For thicker dried grout:
Dampen the grout with water and let it soak for 5-10 minutes. Use a plastic scraper or wooden stick to gently chip away at the grout. Hold the scraper at a 45-degree angle to avoid scratching the tile. Work slowly and carefully. Clean up loose grout pieces as you go. Finish with a damp cloth.
Removal Methods By Tile Type
Ceramic Tile Grout Removal
Ceramic tiles are fairly durable and can handle most cleaning methods.
For light grout haze: Try the vinegar solution method. Scrub gently with a nylon pad. Rinse thoroughly and dry.
For stubborn dried grout: Apply a commercial grout haze remover made for ceramic tile. Let it sit for the recommended time. Scrub with a nylon brush. Rinse well. If needed, use a plastic scraper for thick spots.
I’ve found that warming the vinegar solution slightly (not hot) can make it more effective on ceramic tiles. Just microwave it for 15-20 seconds before putting it in your spray bottle.
Porcelain Tile Grout Removal
Porcelain is very dense and resistant to staining, so you can use slightly more aggressive methods if needed.
For light haze: Try the vinegar solution method first. A commercial grout haze remover for porcelain works well. For small areas, a pencil eraser can sometimes remove grout haze.
For thick dried grout: Moisten the grout with water. Use a plastic scraper to carefully remove the bulk of the grout. Follow up with a chemical cleaner for remaining residue. Rinse thoroughly.
Porcelain tiles sometimes have a special glaze that can be damaged by harsh scrubbing. Always check that your tools won’t scratch the surface by testing in an inconspicuous area first.
Stone Tile Grout Removal (Marble, Granite, Travertine, etc.)
Natural stone requires gentle treatment to avoid damage.
NEVER use: Vinegar, lemon juice, acid-based cleaners, or abrasive scrubbers.
Safe methods for stone: Plain water with a soft cloth. pH-neutral stone-safe grout haze remover (follow package directions). Baking soda paste (for small areas): Mix baking soda with a small amount of water to form a paste. Apply to grout. Gently rub with a soft cloth. Rinse thoroughly.
For stubborn grout on stone: Use a wooden craft stick or plastic scraper (never metal). Work at a low angle to avoid scratching. Use very gentle pressure. Clean up debris as you go. Finish with a stone-safe cleaner.
I once had to remove dried grout from expensive marble tiles. I found that patience was key – working in very small sections and taking breaks prevented damage to the stone. For natural stone, it’s always better to work slowly than to risk permanent damage.
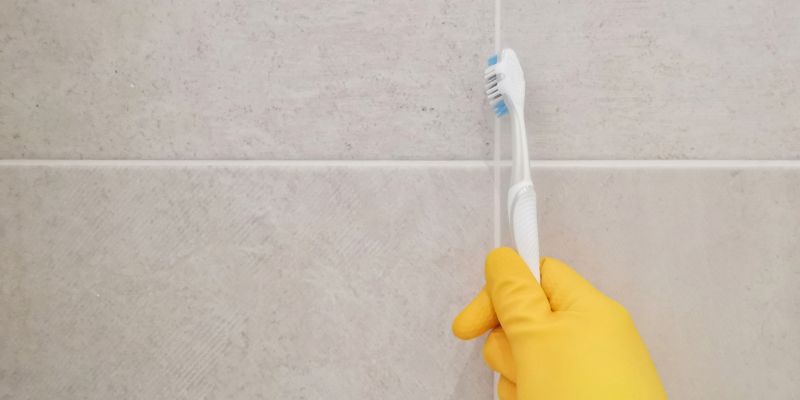
Textured Tile Grout Removal
Textured tiles present a special challenge because grout can hide in the low spots.
Effective methods: Softening with water, then using a soft toothbrush to get into crevices. Using a toothpick to carefully pick out grout from deep textures. Creating a paste with baking soda and water for gentle scrubbing. Using a grout haze remover appropriate for your tile type.
For deep textures: Soak the area with water for 10-15 minutes. Use a soft brush in circular motions. Rinse and repeat. Try a wet/dry vacuum to pull moisture and loosened grout from low spots.
Old electric toothbrushes make excellent tools for textured tiles. The vibration helps loosen grout without requiring much pressure that might damage the texture.
Glass Tile Grout Removal
Glass tiles can scratch easily, so extra care is needed.
Safe methods: Water and a soft cloth for light haze. Very gentle plastic scraper for thicker areas. Commercial grout haze remover made for glass tiles. Sugar water solution: Mix 1/4 cup sugar with 1 gallon warm water. Apply to grout with a sponge. Let sit 10 minutes. Wipe clean.
When working with glass tile, always use the gentlest method first. The surface can scratch much more easily than you might expect. I recommend using only plastic tools that have been checked for rough edges.
Location-Specific Techniques
Bathroom Tile Grout Removal
Bathrooms often have mixed materials and tight spaces.
Special considerations: Protect fixtures and metal surfaces from cleaners. Work carefully around caulked areas. Use extra ventilation when using chemical cleaners. Pay special attention to shower corners where grout may be thicker.
Read Here: What Type of Caulk for Toilet Base?
Most effective approach: Start with plain water methods. Use a plastic scraper for thick spots. For grout in corners and around fixtures, use a wooden craft stick. Clean one small section at a time, keeping surfaces wet while working.
Kitchen Backsplash Grout Removal
Kitchen backsplashes present unique challenges with grease and tight spaces.
Tips for success: Cover countertops with plastic sheeting or towels. Turn off electrical power if working near outlets. Use only small amounts of liquid to prevent drips. Work in small sections from top to bottom.
For grease-affected areas: Clean any surface grease first with dish soap and water. Then proceed with appropriate grout removal methods. Take extra care around any decorative or metallic tiles.
When working on kitchen backsplashes, I place a towel along the counter edge to catch any drips and prevent cleaner from reaching the countertop surface, especially important with natural stone counters.
Floor Tile Grout Removal
Floor tiles often have the most stubborn grout due to the large surface area.
Effective approaches: Work in small 3×3 foot sections. Use knee pads to protect yourself. Allow longer soaking time (up to 15 minutes). Use a slightly more abrasive scrubber than you would on walls.
For large floor areas: Consider a commercial walk-behind floor scrubber (rentable). Use a wet/dry vacuum to remove used cleaning solution. Change water frequently to prevent redepositing grout residue.
Floor grout removal is the most physically demanding. Take breaks and switch positions often. I’ve found that working backward toward the exit ensures you don’t walk over freshly cleaned areas.
Step-by-Step Removal Method for Very Stubborn Grout
For the most difficult cases, here’s my detailed approach:
Prepare the area: Remove all items from the workspace. Protect adjacent surfaces. Ensure good ventilation. Put on protective gear.
Soften the grout: Apply warm water. Cover with damp towels. Let sit for 30 minutes. Keep the towels damp by misting occasionally.
Initial removal: Remove the towels. Use a plastic scraper to gently chip away softened grout. Work at a low angle to prevent scratching. Remove loose pieces with a vacuum.
Chemical treatment: Apply appropriate cleaner for your tile type. Let sit for recommended time (usually 10-15 minutes). Do not allow to dry.
Scrubbing: Use a nylon pad or soft brush. Work in circular motions. Apply moderate pressure. Focus on small areas at a time.
Rinse thoroughly: Wipe with clean water several times. Change rinse water frequently. Use a wet/dry vacuum for floors.
Final cleanup: Buff dry with microfiber cloth. Inspect for remaining residue. Spot treat any remaining areas.
Sealing (optional): Allow tile to dry completely (24-48 hours). Apply grout sealer to prevent future staining.
Removing Grout Without Power Tools
Many homeowners prefer to avoid power tools for grout removal. Here are effective hand methods:
Manual Grout Removal Tools
Hand grout saw: Has a small carbide blade. Good for removing grout from grout lines. Requires patience and steady hand.
Grout grabber tool: Has a triangular carbide tip. Designed for grout line cleaning. Less likely to damage tile edges.
Utility knife: Use with extreme caution. Only on wider grout lines. Hold at low angle to prevent tile damage.
Hand Tool Technique
Hold the tool at a consistent angle. Work along the grout line away from your body. Apply moderate pressure. Make multiple light passes rather than forcing the tool. Vacuum debris frequently. Keep the work area clean.
When using hand tools, sharpen or replace dulling blades often. A sharp tool requires less pressure, reducing the risk of slipping and damaging tile.
How to Soften Grout for Removal
Sometimes grout is too hard for direct removal. Here are methods to soften it first:
Sugar Water Method (for fresh grout only)
Mix 1/4 cup sugar with 1 gallon warm water. Apply liberally to grout. Let sit for 30 minutes. The sugar disrupts the curing process. Scrub with a nylon pad. Rinse thoroughly.
Vinegar Soak (ceramic and porcelain only)
Soak paper towels in vinegar solution. Apply directly to dried grout. Cover with plastic wrap to prevent evaporation. Let sit for 1 hour. Remove and scrub.
Commercial Grout Softener
Purchase a product designed for your tile type. Apply according to package directions. These products often contain mild acids or chelating agents. They break down the cement bonds in the grout.
For extremely stubborn grout, I’ve had success with repeated applications of cleaner, allowing time between each application. Sometimes it takes 3-4 treatments to fully break down really hard grout.
Natural Cleaning Solutions
If you prefer to avoid harsh chemicals, try these natural alternatives:
Baking Soda Paste
Mix baking soda with water to form a thick paste. Apply to grout. Let sit for 30 minutes. Scrub with a soft brush. Rinse thoroughly.
Works well on: Ceramic, porcelain, and some stone tiles
Lemon Juice Solution (not for natural stone)
Mix equal parts lemon juice and warm water. Apply to grout with spray bottle. Let sit for 10 minutes. Scrub with nylon pad. Rinse thoroughly.
Works well on: Ceramic and porcelain tiles only
Hot Water Steam
Use a steam cleaner with a pointed attachment. Direct steam at grout lines. Wipe away loosened grout. Follow with a clean damp cloth.
Works well on: Most tile types including natural stone (use low setting)
Special Case: Epoxy Grout Removal
Epoxy grout is extremely difficult to remove once cured. It’s a resin-based product rather than cement-based.
For fresh epoxy grout (within 24 hours): Use warm water and dish soap. Scrub vigorously with a white scrub pad. For stubborn areas, try special epoxy grout cleaners. Follow manufacturer directions exactly.
For cured epoxy grout:
Commercial epoxy removers are your best option. These contain strong solvents. Test in inconspicuous area first. Wear protective gear including gloves and eye protection. Follow all safety precautions on the product label.
I once had to remove epoxy grout from a shower installation. Even with commercial removers, it required multiple applications and a lot of elbow grease. If you’re dealing with fully cured epoxy grout, be prepared for a challenging project.
Preventing Damage During Grout Removal
Protecting your tiles should be your top priority:
For Ceramic and Porcelain
Avoid metal scrapers or abrasive pads. Don’t use excessive pressure. Keep the surface wet while working. Rinse tools frequently.
For Natural Stone
Never use acidic cleaners. Test all products on hidden areas first. Use minimal water on porous stone. Dry thoroughly after cleaning.
For Glass Tiles
Use only plastic tools with no sharp edges. Avoid dragging grit across the surface. Use very gentle pressure. Check for scratches frequently while working.
Common Mistakes to Avoid
Learning from others’ errors can save your tile:
Using too much pressure – Let the cleaner do the work. Wrong cleaner for tile type – Always verify compatibility. Not testing first – Always test in a hidden area. Letting cleaners dry on tile – Keep surfaces wet while working. Using metal tools – These almost always scratch tile. Rushing the process – Patience prevents damage. Inadequate rinsing – Cleaner residue can cause problems later.
When to Call a Professional
Some situations warrant professional help:
Valuable or rare natural stone tiles. Large areas with extremely hardened grout. Failed attempts that have damaged tiles. Epoxy grout on sensitive surfaces. If you’re not confident in your abilities.
Professionals have specialized tools and products not available to consumers. They also carry insurance if something goes wrong.
Care After Grout Removal
Once you’ve successfully removed the dried grout:
Clean the entire tile surface with appropriate cleaner. Allow to dry completely (24-48 hours). Apply grout sealer to prevent future staining (for cement-based grout). Consider applying tile sealer for porous tiles. Establish a regular cleaning routine.
Take photos of your clean tile when finished. This gives you a reference point for future maintenance and can help you spot problems early.
Preventing Future Grout Problems
To avoid going through this process again:
During installation: Clean grout promptly before it dries. Use less grout to avoid excess. Work in small sections. Have clean water and sponges ready.
Regular maintenance: Clean tiles regularly. Deal with spills quickly. Reseal grout annually. Address grout issues when small.
Final Words
Removing dried grout from tile takes patience and the right approach. By matching your cleaning method to your specific tile type, you can restore your tile’s beauty without causing damage.
Remember: Identify your tile type first. Choose gentle methods before trying stronger options. Work in small sections. Keep the surface wet while working. Use plastic tools instead of metal. Rinse thoroughly when done.
With the techniques in this guide, you can tackle even stubborn dried grout and enjoy your beautiful, clean tile surfaces again.
FAQ: Common Questions About Grout Removal
How long does grout take to fully cure?
Most cement-based grouts take 24-48 hours to set and 7-10 days to fully cure. Epoxy grouts cure faster, often within 24 hours.
Can I use a pressure washer to remove dried grout?
No, pressure washers are too powerful and will likely damage your tiles and existing grout lines.
Will WD-40 remove dried grout?
While some people suggest this, it’s not recommended as it can stain porous tiles and create a slippery surface.
How do I know if my tile is sealed?
Place a few drops of water on the tile. If it beads up, the tile is sealed. If it darkens or absorbs, it’s unsealed.
Can I use a hair dryer to help soften grout?
Gentle heat can sometimes help soften grout. Use on a low setting and combine with water for best results.
How can I tell if I have cement grout or epoxy grout?
Cement grout has a grainy, porous appearance and can stain easily. Epoxy grout looks more plastic-like, is very hard, and highly stain-resistant.
Will muriatic acid remove dried grout?
While effective, muriatic acid is extremely dangerous and can damage many tile types. It should only be used as a last resort by professionals with proper safety equipment.
How can I remove grout without damaging existing grout lines?
Work carefully with plastic tools, moving parallel to grout lines rather than across them. Use painters’ tape to protect grout lines you want to keep.
Is it possible to remove all the grout from my tile floor?
Yes, but it’s very time-consuming. If you want to completely regrout, consider using a grout removal tool that fits on an oscillating multi-tool.
How much does professional grout removal cost?
Professional services typically charge $1-3 per square foot for grout removal, with higher rates for natural stone or difficult conditions.